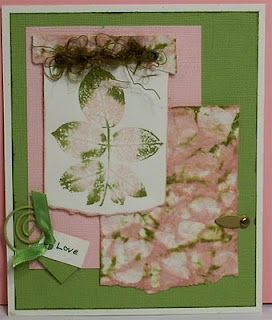
Today's TT post is about crumpling and distressing paper. The pink and green panel on this card started out as a piece of ivory card stock.
Here's how it's done:
- Crumple cardstock, paper, or decorative paper into a tight ball. Open and crumple again.
- Smooth crumpled piece so that there are still some raised ridges.
- Rub stamp pad over this piece, getting color on the ridges. Don't press too hard, as you want the "valleys" to remain inkless.
- Crumple piece again. Open and smooth out piece. If you are happy with the look, you are finished. You can add more ink and repeat above steps if more color is needed.
- Optional: Repeat above steps with second color.
- Optional: After first inking, try spritzing with a fine mist of water before re-crumpling. This softens the ink and gives a more diffused look. That is what I did with the panel on the above card.
- Smooth until flat (can be pressed with an iron if desired).
This is a really fun technique. It can be very addictive, so set aside some time. You'll want to distress everything!
Enjoy!
Peace and blessings,
lynda


Oh Lynda! I forgot how pretty these papers can be. I've got to go make some now LOL. Keeley is getting sooo big! What a pretty little girl she is.
ReplyDeleteIsn't distressing addictive!!!! What a great job on all your projects. :)
ReplyDelete