Tuesday, October 27, 2009

Technique Tuesday - PAPER PLEATING

HOW TO PLEAT PAPER

I have had a request for a how-to on paper pleating, so decided to write my Technique Tuesday on the paper pleating technique.  It's a really easy technique to do, and the results are very striking.  Often a little pleating on a card or page is just the thing it needs.  Here's how it's done: 

PINCH PLEATS 


  • Begin with a strip of paper approximately 1 1/2" wide. Score first at the 1" mark, then at the 1 1/2" mark, then at 2 1/2", then at 3", alternating between adding 1/2" and 1" until you get to the end of your strip.                                                 
  • Apply tape runner along the top edge of your scored strip (either edge if no pattern).
  • Using the scored lines, accordion fold the pre-scored strip.  Beginning at the left side, make a mountain fold (paper folds up like a mountain), then a valley fold (paper folds down, like a valley).  Repeat mountain and valley folds, tucking each 1/2" section behind the 1" sections to form the pleats.
  • To create a longer strip, repeat the process on a second strip.  Adhere to first strip by taping two half-inch sections together. This is so the seam will be tucked behind a pleat, where it will not show from the front of your card or page.
  • If you like a distressed look, lightly sand or sponge ink to your pleats, or distress the top and bottom edges.
  • Adhere to card or page with tape runner.  For a more finished look, attach ribbon or trim along the top edge of the pleated strip to hide the edge.

BOX PLEATS


  • Begin with a strip of paper your desired width, say 1/2" or 1", depending on where you will use it. Score at 1", then 3/8", then 1", then 3/8" intervals along entire strip on back of paper.
  • Starting at one end, begin pulling and pinching and pleating on the scored lines.  You will be folding the 3/8" scores toward each other, alternating from front and back sides, until all folds are completed.
  • Run tape runner across the back of the strip to hold the pleats in place.
  • Adhere to card or page with tape runner.  For a more finished look, attach ribbon or trim along the top edge of the strip to hide the edge.
  • On this card, I lined the "valleys" with tan cardstock to offset the pleats and break up all the green. I just cut 1/2" strips of tan and taped them in the valleys.
That's it!!  I told you it was easy!  Now, you try it.  And be sure to let me see what you created!

Enjoy and savor this glorious fall day!!

lynda

Friday, October 23, 2009

Bridal Shower Favors

It's SIX WEEKS till the wedding!!

There, I got that out!  Whew!  These weeks are flying by, there's so much to do.  Faith (my daughter) is holding up well, and surprising me with some very sensible decisions and choices.  I'm actually doing very well, also.  
We've been busy, busy, busy, getting things ready, having fittings, last minute changes and orders, and so much more.  
Right now my focus is on this weekend, Sunday, to be exact.  That's Faith's bridal shower here in Rochester.  My friend, Sylvia, and I, are giving it.  It is being held at Sylvia's house, and I must say everything is simply lovely.  We decorated Tuesday, copying Martha Stewart's ideas.  We have shimmering tulle in the chandelier, with crystals hanging from it.  There is tulle "poufed" around the table, with ribbons and beads.  It looks magical.  All I can say is, move over Martha!  lol.

Seriously, though, I think Faith will be pleasantly surprised when she sees it.  Sylvia is very, very talented with food  and hospitality.  She's a hostess to the max, and really knows how to plan a party.  I am the designated design artist for invitations, favors, decorations.  We make a great team, and it has been fun planning this event.  Hmmmm.....maybe we should go into business with this!


Anyways, back to the blog.  I have posted a couple of pictures here of the favors.  I made the little candy "purses" as an afterthought, after I already made these post-it holders.  Had to have 'em, as they're just too cute, and Faith loves purses and shoes!  They (the purses) have little Hershey's nugget chocolates in them.  


The Post It holder is actually one of those acrylic frames.  I got them at the Christmas Tree Shop for 89 cents each.  Instead of standing it up, I laid it flat.  I slipped a piece of vellum paper with rosebuds on it inside the frame, to fit, taped these pretty post-its (Joann Fabrics had them) onto the top, then tied a ribbon around the top.  I embossed the butterfly (Penny Black stamp) and colored it from the back with markers.  That's it....easy, and very elegant.  These can be done for any occasion with different types of papers.


So, now I'm working on the thank you notes.  Hope to have them done by Sunday, so Faith can take them home with her.  After that project, I will be making the card box for the wedding.  I made one for one of Faith's friends, and she wants me to make hers. Here's the one I made for her friend's wedding.  The colors on Faith's will be different, and a different design, more elegant, less whimsical.  Can't wait to go shopping for the supplies and pick the colors.  She wants ivory with gold, with some flowers and ribbon.


Well, it's off to dreamland for me.  Been a loooooong week.  I have cookies to cut out and bake tomorrow for the shower, a prayer shawl to deliver, vegetables to get into the freezer before they spoil (from our farmer's market), finishing touches for the shower, and a shower gift to shop for yet, all before Sunday!


Hope you have a wonderful weekend.  Enjoy our fall blessings!


Joyfully,


lynda


Wednesday, October 21, 2009

Technique Tuesday - White Resist Double Embossing


This Techique Tuesday I am sharing one of my very favorite techniques.  I used white embossing powder, clear embossing powder, and pigment ink pads to create this card.

The floral panel attached to this card was created with double embossing.  Here is the technique:

  • Emboss flower stamp (Hero Arts) with white pigment ink and white embossing powder.
  • Using desired shades (in this case blues and greens) of pigment inks, rub inks directly onto the card panel, over the embossed image. Use three or four colors, starting with the lightest color and working up to the darkest color.
  • Use a tissue to gently blend the colors of inks, and to remove the pigment ink from the embossed image.  Do not rub tissue too long, as you want the ink to remain slightly wet.
  • Pour clear embossing powder over the entire stamped panel, then heat and emboss.  The white image will "pop" out, and the inked background will be embossed with a glazed finish.
To finish constructing the card:
-Tear scrapbook paper and attached it to a blue A2 card.
-Stamp swirl stamp (Hero Arts) on the bottom left with white ink.
-Attach the embossed panel to a white torn panel, about 1/2" larger all around, then distressed it with blue and green inks. 
-Stamp BELIEVE onto blue scrap and distress.  Attach straight pin threaded with beads.  Attach to panel.

That's it!  I do love this technique.  Try it with some fall colors for your fall and thanksgiving cards! Let me know how you do - I'd love to see your work!

Blessings,

lynda

Sunday, October 18, 2009

ATC Swap Card for Magenta Swap


I got my trading cards in the mail yesterday for Picatso's (Magenta Rubber Stamps) Artist Trading Card swap - The Colors of Fall.  This is my ATC for the swap.

The guidelines stipulated using Magenta stamps, and I just love this one.  40138-J is the stamp number.

I stamped it on the green cardstock, then on the brick, brown, and plum.  I mounted the brown leaf and the plum acorn (cut out) onto the orange card. Then I cut openings in the green card front, cutting out the leaf and acorn along the outline, so you can see down into the ones I mounted onto the orange card.  I attached the green card over the orange card using foam mounting tape for dimension, and to give the openings "windows."  I attached the brick leaf with foam tape over the green card.

All images were colored with Berol Prismacolor pencils, with white added.  I distressed the edges, and added highlights with the clear Stardust gel pen.  Three rhinestones were added to finish off the ATC.

I can't wait to see what I get back.  I made 10, and will receive 9 back.  I will post them when I receive all of them.  Here's a link to the Magenta Group on Yahoo, if you're interested in joining the group. It has lots of interesting challenges, swaps, and techniques.  http://groups.yahoo.com/group/MagentaCN/

Now I'm off to bed.  It's been a busy day - Farmer's Market this morning, cleaning the house, laundry, working on Prayer Shawl flyers for the ministry fair at church tomorrow, and making a big pot of chicken noodle soup!!

See you soon.

Blessings,

lynda

Tuesday, October 13, 2009

Technique Tuesday - Vellum Embossing


I love vellum.  It gives anything you make an air of elegance.  It is versatile, it's translucent, and there are many techniques available for using it on our cards, pages, and projects. 

In this posting, I am going to talk about pressure embossing on vellum.  This is where an embossing tool is used to actually impress the paper.  Thermal embossing is where you use embossing powder and a heat tool to emboss.  Now that we have our terminology out of the way, let's move on to the technique of pressure embossing on vellum.

For this card, I stamped the heart (Impression-Obsession stamp) onto the vellum with white Staz-On ink.  It is important to use a permanent ink, NOT pigment ink, as it will smear and never dry on the vellum, as vellum has no pores to absorb the ink.  Let the Staz-On dry (you can heat set with your heat tool if you like) before starting.

Turn the stamped vellum so that the stamped image is face-down on a piece of foam (like the foam craft pieces you can get in the craft stores, or a mouse pad), or even a plastic foam bottomed place mat.  Using an embossing stylus (the kind you use with embossing templates), follow the outline of the stamped image, pressing firmly, yet not too hard so you don't poke through the vellum.  Practice a few times on scrap before trying this on your good piece.  You will soon "feel" how much pressure to apply.  You will notice the paper "embossing" itself, and the image will become more pronounced on the front.  Turn the piece over, and there you have it....embossed vellum! 

It is very elegant and so pretty just as it is, but if you choose to add color, as I did on this card, simply use markers to color the wrong side of the image.  The color will show through the front, very softly and elegantly.

Attach with brads, eyelets, or by taping in the design area, or using vellum tape or vellum adhesive spray.


Here is a small enclosure card I made with the embossed vellum technique.  I added texture to the leaf, stem, and petals by "scratching" veins in the  vellum as I embossed.  I also embossed he word create after I stamped it vertically up the left side.


That's it for today.  I hope you enjoy this technique. 

I have been busy making favors and little candy purses for Faith's bridal shower coming up in just over a week and a half now.  I made acrylic post-it holders.  I will post pics later in the week, so be sure to check back.

I also finished my trading cards for the Magenta swap, but the pics came out poorly, so I will have to take them outside in the natural light tomorrow, and will post those later, as well.  So, lots to come back for.  Stay tuned.....

Blessings,
   lynda
  

Tuesday, October 6, 2009

Technique Tuesday - Bleached Effects

Yes, you read the title correctly.  Today we are going to use bleach on our cards and projects.  I use regular household bleach, although I have heard of people using the bleach cleaners available for cleaning bathrooms, etc., such as Clorox cleaner with bleach.

What you'll need:  Bleach, Cut n' Dry foam pad or dense sponge, small bowl or plate, rubber stamps, makeup wedges

Stamping with Bleach
  • Create a bleach "stamp pad" by cutting a piece of Cut n' Dry foam pad about 3" x 4".  Pour some bleach into a small bowl, and place the foam side of the pad into the bleach, allowing it to soak up the bleach.  Squeeze out excess so that the sponge is wet, but not dripping.  Place it foam side up in dish or bowl.
  • "Ink" up your stamp using the above prepared bleach pad.  Ink it as you would ink a stamp in an ink pad.
  • Stamp onto your card or project, making sure to hold the stamp down a few seconds to give the bleach time to work into the cardstock.
  • Not all card stock takes bleach the same, and some card stocks will not bleach out.  Always test a scrap piece of your project to see how the bleach reacts with the card stock.  The color that the paper bleaches out may not be what you would expect.
  • Clean your stamp immediately so that it will not dry out from the bleach.  The bleach will not harm your stamp, as long as you clean it with soap and water after using the bleach on it.
Edging with Bleach
  • Pour some bleach into a small watercolor cup.
  • Dip a makeup wedge into the bleach so that it gets some bleach on it.
  • Run the bleached makeup wedge along a torn or straight cut edge of card stock.  The color will fade out from the areas the sponge touches.
Spattering and Painting with Bleach
  • Pour some bleach into a small watercolor cup.
  • Dip a watercolor brush into the bleach.
  • "Paint" stamped image with the bleach brush.  Repeat if necessary until the color you desire is achieved.  The painted areas will remove color from the card stock.
  • To spatter, dip the paintbrush into the bleach, then gently tap the brush over your card or project. The areas that get spattered will lighten and fade.


In this card, I embossed the images in black.  I bleached them as follows:  The top flower I painted the entire flower with the brush with bleach on it.  The center flower I colored with blue and green markers, the I bleached the outside of the flower, just outside the outline of the image, to create a white shadow effet.  The bottome flower I colored with markers the painted the outside around the flower with bleach, creating a whiteish background.

 
I created the background on the pink layer of this card by inking my stamp with bleach and stamping it repeatedly, as described in the directions above.


This card did not scan well, but the image is a flower which was stamped with bleach.  I also stamped the head of the flower with bleach on the letter G.

There you have it, three cards using bleach.  I hope you enjoyed this Technique Tuesday, and will come back for more.  Give bleach a try, it's fun, and it is always a surprise when you see the results!  Have fun with it.

Blessings,

   lynda


Sunday, October 4, 2009

Call Me Paparozzi Nana! Meeting Ryan Miller of the Buffalo Sabres!!

We went to Buffalo today for hubby to get fitted for his tux for our daughter's upcoming wedding, and to "return" Keeley after having her since Friday.  We had a great weekend with our granddaughter, and came home tired, but content.  There is nothing like having a four year old tomboy running around your house to keep you young!
On the way home from the tux fitting we all stopped at Wegmans to pick up some groceries (Faith wanted to make soup for Dan who has a cold).  As we're shopping, Faith spotted Ryan Miller of the Buffalo Sabres.  She informed me that he is the "Jim Kelly of hockey," and the top Sabres player.  She asked Dan to take Keeley over to him and ask for his autograph.  But neither of them could make themselves do it.  So, instead, we walked around Wegmans, and every time we saw him (he was with his girlfriend), Faith tried to get the courage to approach him.
Finally, at the checkout, he was two checkouts over.  I said, "Give me Keeley."  I took her, my camera, and a notepad I had in my purse, and went over and waited for him to check out.
He saw me and I motioned to my camera and Keeley.  He shook his head, and when he got through the line, he graciously posed for pictures with Keeley and me, signed an autograph for her, and gave her a high-five and told her he liked her outfit (she and Faith and Dan were all decked out in their Buffalo Bills duds for the game today).  I have posted a couple of the pics here.

I have already sent for the pictures, and can't wait to pick them up so I can scrapbook them.  The kids have his autograph safely framed and put up on Keeley's wall already!  We had a great day, in spite of the rain.  Wish I could say the same for the Bills!  Must be that Miami heat!  I have a very busy week this week, with meetings, talks to prepare and deliver next weekend, and prayer shawls to deliver.  But I hope to get these pics back and get a couple of them scrapbooked and posted soon.  I really must document our mini paparozzi team of Keeley and Nana!
In the meantime, I thought I'd share this card I made for my aunt.  It's a Penny Black stamp, and I watercolored it with markers and highlighted with the Stardust clear gel pen.  I crinkled and distressed the yellow strip behind the image.  Finished off with a ribbon a some knots!
Now, it's off to bed for some much need sleep!
Joy,
lynda


Thursday, October 1, 2009

Fall Inspiration


I made this fall card with Impression-Obsession's clear fall set, and Marvy Matchables inks.  I love the variety of stamps in this set.  The FALL LEAVES verse which waves along the center is actually a straight clear stamp.  When I attached it to the mount, I "waved" it by manipulating it so that it curves up and down. That's one of the things I love about the clear stamps.  They can be manipulated and changed to fit almost any need.

I love fall!!  It's my favorite time of year.  The air is crisp, the harvest is rich, and the color in nature is a feast for the eyes.  Apples are at their juiciest and tastiest, and pie season is just around the corner!  What's not to like?

As I sipped my coffee this morning, I was thinking about the changes my life has taken through the years. Some of them were joyful events, some sad, some lesson-bearing, and some necessary. But each change brought about opportunities for growth.

I thought about how much we are like the trees beginning to turn colors. Most of us dislike change. Change in our lives forces us to look at things differently, to try things we may not want to do. It makes us uncomfortable. It makes us stretch. If only we realized that often change brings about something even more beautiful in our lives, as the colors changing in the fall leaves. Change makes us grow, and strengthens us.

The long, lazy days of summer are behind us. Autumn is unmistakably here, in all her beauty, waiting to be appreciated. Don't let it slip by.  Winter will follow, with now and cold, and even some joys of it's own (ok, so maybe joys is a little stretch). But why worry about that now.  Today has it's own splendor waiting to be savored.  I hope you'll take some time to enjoy this season.  Take a walk, plant some bulbs for spring color, watch the leaves fall, paint a pumpkin, make pumpkin seeds, press some leaves, feed the squirrels, wash all your windows (just wanted to see if your were paying attention), try a new craft or sport, spend time with a child, contact an old friend, start a new project, hug someone.

Who knows, you may just find yourself enjoying the cooler weather, and even looking forward to winter!

Joy,

lynda

Tuesday, September 29, 2009

Technique Tuesday - Perfect Pearls Techniques

I love to use Perfect Pearls pigment powders by Ranger on my cards and scrapbook pages, and other paper crafts projects.  These pigment powders are pearlescent, and come in six color palettes.  They can be used wet or dry to create dazzling pearlescent effects.  Here are three cards that demonstrate just four of the techniques possible.


Dusting 
  • Ink stamp with clear VersaMark ink pad, or Perfect Medium.  Don't over-ink your stamp, and be sure to let the image dry for a minute, especially if the pad is very wet and inky. 
  • Apply Perfect Pearls with a DRY small watercolor brush. To apply, simply dip the tip of the brush into the powder, and brush it onto the part of the stamped image you want that color on. Repeat with other colors, as desired.  If your stamped image is too inky or wet, the powder will smear. Be sure to wait until it has dried a little to prevent this blurring.
  • Remove excess powder with larger, duster brush.  Simply brush over the powder until all traces of excess powder are removed.  The background and the flower in this card were done with the dusting technique.
  • No need for fixatives.  For increased sticking, just spritz with a very light mist of water.


 Painting and Spattering
  • The resins (binding agent) are built in to Perfect Pearls, so there is nothing to add.  Simply add water to create pearlescent paint. The amount of water you add will determine how transparent the paint is.
  • Remove some powders from the jar with the tip of your watercolor brush and place on palette.  Dip brush into water and add a drop or two at a time, and mix, until it is the consistency needed to paint.  The amount of water you add will determine how strong the color is on your image.
  • "Paint" the  image with this mixture.  For added depth, color image first with a marker, then paint over the marker coloring with the Pearls.  The flower in this card was painted in this fashion.
  • Spattering - To create spatters, work up some "paint" on your palette with the Pearls and water, making it quite wet.  Load your brush, then tap the brush while you hold it over your card or page that you wish to spatter.  You can see this look on the black panel on the above card.


Batik Resist
 The picture here does not do this card justice, as you can't see the shimmer of the Pearls.  This batick technique is one of my favorites, and it's so easy to do.
  • Emboss images on white or light cs (cardstock) with clear VersaMark or Perfect Medium,  and emboss with clear embossing powder.  Create a random design with the embossed images on your card or page. 
  • Mix water with dye based reinkers and swirl onto this embossed cs, blending colors.  Do not over-blend as this will make the colors muddy.  No need to cover entire card.  
  • Next, pick up some complimentary Perfect Pearls, and some metallic, such as gold, Perfect Pearls with the water brush, and add to the composition.  
  • Dab with a paper towel (do not rub) to remove excess wetness.  Let dry a minute or two, then press between newsprint with hot iron till embossing melts off into newsprint.  You can use scrap paper, such as computer paper.  The images that were protected by the embossing will “pop out,” creating a fabulous, shimmery background.
That's it for today.  Check back soon for more blog posts.  I am working on a Fall Colors trading card for a Magenta trading card swap I entered.  I will post that as soon as it is finished.

Right now, I'm off to finish shower invitations.  Hope you have a great evening.

Blessings,

lynda

Saturday, September 26, 2009

Winter Wedding!!! Elegant Bridal Shower Invitation

FINALLY, my prayers are being answered.  My daughter, Faith, and Dan are getting married!!! I'm so excited...can you tell?  It will be a very intimate ceremony with a small reception following, as the kids are footing the bill themselves.  It  will be a romantic winter wedding, December 5th.  He proposed by arranging 100 lit votive candles (in holders) in a trail leading from the apartment door to the living room fireplace, where he had them arranged into a heart shape. Under each candle was a pink construction paper heart with a reason why he wanted her to be his wife. 100 different reasons!!!  This is what Faith saw when she got home from work that night.  Now, this kid can give hubby some lessons!

So, now that I've gotten that announcement done, I wanted to share the shower invitation I made for a shower my friend, Sylvia, and I are having next month.


I blocked the address to protect out of consideration to my friend 


The rose was embossed with gold embossing powder, then water-colored.  I added a tiny bow, a crystal on the rose, and a "dew-drop" of Diamond Glaze on the leaf.  I used a border punch along the bottom edge, so the pink shimmer paper shows through.  The invitation itself was composed on my computer, then I printed it onto ivory cardstock, and cut it to size.  It scanned poorly, so it looks like brownish splotches are on the paper, but they're not.  It's just ivory cardstock.  It's 5 1/2 x 5 1/2 inch square, with no fold-over, just a single panel, layered.  Her bridal party loved it so much they asked me to make their shower invitations for them!  Of course, I will.  How can I say no?!

Blessings,
     lynda

Wednesday, September 23, 2009

Garage Sale This Weekend - Saturday and Sunday 9/26 & 27

The element where I had the garage sale details and a really good map has been giving me trouble and not working all the time.  It goes up for a while, then blanks out, so here is the info again:

DATES:  THIS WEEKEND SATURDAY AND SUNDAY 9/26 & 9/27
               
TIME:  9 AM - 4 PM BOTH DAYS

Stamps, supplies, scrapbook supplies, papers,  accessories, embellishments, and MORE! Everything marked way, way down.  Most at least half price and many items 70% off and more!!

WHERE:  65 DALSTON ROAD, ROCHESTER (GREECE) It's near the old, old store that was up on Dewey by the Dutch Mill.  If coming down Stone Road (Off Ridge Road), turn right on Dewey, then right on Dalston.  Carbone's Pizza is on the corner.  Or you can Google it.  If you still need help, call Karen at 585-414-1440 or me (lynda) at 585-663-0073.

Hope to see you there.

Tuesday, September 22, 2009

Technique Tuesday - Direct-To-Paper Inking Technique

Sometimes I will distress my cardstock or even decorative scrapbook papers using ink directly on the paper.  Here are some ways to do this:


  • Peaks and valleys:  Crumple your paper, then smooth it out (sanding is optional). Skim the paper with an ink pad, applying ink color to the peaks.  Do not press too hard, you just want to skim along the tops.
  • Light coverage:  Put the ink pad face down on your paper and lightly tap it to apply color.
  • Heavy coverage:  Put the ink pad face down on your paper and skim it across the paper, pressing the ink pad firmly down as you go.
  • Edging:  Hold the paper in one hand and ink pad in the other hand.  Run the ink along the edge of the paper.  This is especially effective with a metallic pigment pad, like gold or silver.

I rubbed this scalloped edge directly with an ink pad to highlight the scallop.

  • Sweeping:  Tap the bristles of teh stippling brush onto the ink pad.  Hold the brush at an angle and sweep it across the paper to color.
  • Tapping:  Tap the bristles of a stippling brush onto the ink pad. Hold the brush perpendicular to the paper and gently tap it onto the paper.
  • Masking:  Tear a scrap paper the length of your card or page and lay it over your card or page where you want an inked edge.  Run an ink pad along the torn edge of the scrap paper and onto the card or page, creating an inked torn-look.
  • Emboss designs on your card with white or clear embossing powder.  Apply pigment ink directly to the paper by rubbing on two or three complimentary colors randomly.  Rub gently with a tissue to wipe ink off of embossed areas.  The embossing will act as a resist.
Hope you enjoyed some of these direct-to-paper inking techniques.  Come back next week for more techniques, and stop by frequently for updates to the blog.  I will be posting later this week to show a wedding shower invitation.  Check back soon.

Tuesday, September 15, 2009

Technique Tuesday - Blending Colored Pencils

Everyone loves to learn new techniques, or brush up on techniques they may have forgotten about or need a refresher on.  That's why I'm going to dedicate Tuesdays on the blog for techniques.  Technique Tuesdays each week will feature a technique for stamping and/or scrapbooking.  
For our first Technique Tuesday, I'm going to show you a new technique I learned.  It is like the Gamsol colored pencil technique, which I taught at the store, but instead of Gamsol I am using Hero Arts Ultra Cleaner.  It's their clear design stamp cleaner.  I don't know how to do videos yet, so I had to take some pictures.  A couple are a little blurry, but you will get the idea.  This is the technique I used on the flower on the 8 x 8 scrapbook page I blogged about last week. 
 
Colored Pencil Blending With Hero Clear Design Ultra Cleaner
  • Stamp image to be colored with permanent ink.  I use India Ink Black.
  • Choose three colored pencils in graduated shades.  For this card, I chose a light orchid, medium lavendar, and deep purple.  And, yes, there is a difference in colored pencils.  I use Berol Prismacolor - it's an artist quality pencil, with a consistently soft lead for smooth color.


Color image lightly and completely with the lightest color (light orchid).


      Add medium tone (medium lavendar).  Color part of the petal near where it attaches in the center with the medium tone.  Do not cover the entire petal.  Leave 2/3 of the petal with the light orchid.  Do not worry about the 'line' between the two colors.  We will blend that in the last step.


          Add the final darkest shade (deep purple), using just a small amount where the shadows would be.  The petals underneath, and the place where they meet in the center would be darkest.  Again, do not worry about the unblended lines. 


              Blend shades with a blending tool (I use a Dove Blender pen but instead of the Dove blending fluid, which won't work with colored pencils, I filled it with Hero Arts Clear Desing Ultra Cleaner).  You can use blending stumps or tortillons. I find the Dove Blender works really well, as the tip is firm and will not mush quickly.  Also, I don't need to keep dipping the tip into the fluid to use it.  I used an eye dropper to fill the pen with the ultra cleaner.
                • To blend, start at the lightest part of the design (petal) and rub the fluid into the pencil pigment.  You will see it liquify and blend like magic.  Pull the light color into the medium and darker color.  Keep doing this till all the color is blended nicely.  You can clean the tip of the blender by rubbing it on scrap paper.

                That's it.  It's easy, fun, and very elegant.  I learned this technique on the Hero Arts Blog.  If you haven't joined yet, be sure to check it out
                http://heroarts.com/blogs/club/.


                This is the finished card:

                The flowers were "colored" using this technique.  I stamped the flower frame once on the aqua cardstock.  I stamped the flower portions three times on white cardstock.  I colored the flowers with the blending technique, cut them out in sections, and layered them with foam tape.  I distressed the card layers, punched the bottom of the green layer, punched the butterflies, and added gemstones. The purple strip behind the frame image is from the frame stamp.  I just stamped the background portion onto the strip.
                 
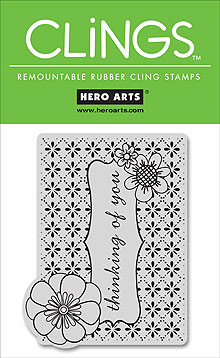
                This is the stamp I used, Hero Arts CG116, Thinking of You.


                Hope you liked this Technique Tuesday.  Stop back often to check out other fun things I'll be doing on the blog.


                Hero Arts Blog

                 I discovered a gem on the internet a few months ago, and I'd like to share it with you.  It's the Hero Arts Blog.  Many of you probably already know about this terrific blog site, but if you haven't seen it, do yourself a huge favor and head on over.  There are posts every day, with lots and lots of ideas and fun.  There are many different bloggers on the site, so you get different styles and types of projects and ideas.

                Sunday, September 13, 2009

                A Stamped Knitting Journal

                My Article on HubPages about my foray into the knitting world

                It was a busy, busy weekend.  We had our granddaughter, Keeley, since Thursday and just brought her back to Buffalo today, Sunday.  Hence, no postings since Wednesday.  It's late, and I'm tired, but just wanted to share this journal I made for my knitting obsession hobby.  I use it to log my completed projects (with pictures of course), details about yarns I have on hand, needles and sizes, and thoughts and ideas on knitting.

                This first picture is the front cover.  I stamped knitting images (all stamps from Magenta) all over the green and lavender paper.  I wrapped the paper onto an 8 1/2 x 8 1/2 cardboard piece, and added the purple strip where they joined.  I added a piece of lavender cardstock to the backside of the front cover to hide the raw edges of the tucked under paper from the front.  I then stamped the sheep stamp onto natural cardstock and layered it, then foam mounted it to the top section.  The three images in the bottom section were stamped onto natural cardstock squares, then "painted" in with a waterbrush.  To do this, I just touched the brush to the outline of the image, and pulled the color in from the outline.  You can do this with dye inks or markers.  I used markers to "ink" the stamps, then stamped them and immediately used the waterbrush to pull in the color.  This is how I was able to get green and lavendar inks on the images.  Then I cut them out, layered them up, and finished up with some fabulous yarn around the cover and through the punched holes along the left edge.

                This next picture is the back of the journal.  I stamped  phrase and quote stamps from Penny Black randomly along the back pieces. 
                I added several pieces of natural cardstock to the inside before tying the journal together with yarn and ribbon.
                That's it!  It's fast, it's easy, and mostly, it will be fun to use.  I can't wait to make more.  Hmmm, one for my doodles, maybe one for books I've read.  A quote journal would be fun, and how about one for the holidays.  I made one a while back for a friend who has tea parties every year, so she could journal and record her tea party pictures and ideas.


                Here's a link to my story on HubPages about my journey into the world of yarn and knitting:
                http://hubpages.com/_quhng16s2trb/hub/Yarn--Knitting-Needles--and-Socks--Oh-My
                Now it's getting late, and I'm off to catch some zzzz's before work tomorrow.  Hope you liked this little project.
                Blessings!
                     lynda

                Wednesday, September 9, 2009

                Cling Rubber Stamps - Why I Love Them

                I won $100 worth of Hero Arts products from a contest I entered a few weeks ago.  One of the stamps I selected is this new cling stamp, (CG115 Thank You).
                I have been having so much fun with it, and discovering it's versatility. But, before I go further, let me tell you how wonderful Hero Arts cling stamps are! They are etched very deeply, so the image stamps beautifully. They cling to the acrylic easily, and unlike many cling stamps, they have an index on the top, so you can see the design through the acrylic mount.  If you have ever used cling stamps, you know how great that feature is!

                For those who have never used, or heard of, cling stamps, I'll provide some information to help you understand what they are.  Cling stamps are regular rubber stamps, except instead of being mounted to wood,  the adhesive side of the foam mount is attached to a piece of cling vinyl. This allows your rubber image to be used with acrylic handle mounts,  as you would with clear acrylic stamps.  The image is sandwiched between the vinyl and the foam so that it cannot be washed, rubbed or worn off. You can use Cling Rubber stamps with any kind of ink you'd normally use with your wood- mounted stamps. They clean the same way, too.  To use, simply press it to an acrylic mount, ink, and stamp!

                Some advantages of cling stamps:
                • Same quality as wood mounted rubber stamps, because they are rubber.
                • Closely trimmed rubber and cushion allows you to see where you are stamping, allowing for precise positioning.
                • Lightweight and easy to transport, taking up very little space.
                • Storage - Simply attach onto a smooth surface, and file in a magazine holder or three ring binder.
                • More cost efficient than wood mounted stamps. 
                Now, back to my Hero Arts Thank You Frame Stamp.  I have so many ideas I want to try with it, and will be posting some of them as I make some cards with it.  
                The frame begs to be cut out, the flowers layered and mounted.  The Thank You in the center can be eliminated by simply not inking it, or, cutting out the inside before mounting.In this 8" x 8" scrapbook layout, I stamped it in black ink onto white cardstock, three times. I cut out the entire image, and mounted it to scrapbook paper. I then cut out the flowers twice, the first time around the outside of the flower, and the second cut was the inside petals of the flower.  
                After coloring with colored pencils, I layered them onto the frame with foam tape.  Some gem stones and Stardust clear gel pen added the finishing touches.  The stamping along the bottom of the page was done with pink ink using another Hero stamp (K5232 Dot Flourish Border).  Although this is a wood mounted stamp, I just had to have it. It is perfect for borders, but, oh, so much more!

                I still need to add my journaling, and perhaps a picture, and then it will go into a special 8 x 8 album I'm making for my daughter, Faith, for her birthday in December.
                Soon I will post the secret to blending the colored pencil I used on the frame and flowers.  Check my next post later this week.
                Blessings,
                     lynda

                A Weekend With "The Boys"

                Labor Day is over, and it was back to work and routine today, but I'm still basking in the glow of the lovely weekend I had. Hubby went to camp with his brothers for some fishing and camping in the woods (NOT my idea of a good time), and I stayed home. I brought home "the boys" Friday night (Ben and Jerry - cherry garcia ice cream), watched four, yep, FOUR chick flicks. Saturday I went to the farmer's market, ate rice pilaf from a box, drank wine, stamped, scrap booked, and wrote. I spent Sunday with my inspiring scrapping buddy, Karen, and on Monday I organized my craft room!
                Phew, I'm getting tired just writing about it.  But, oh, did I have fun!  Yes, it is good to have hubby back home, but the weekend reprieve was exhilarating, and just what I needed to jump-start my creativity.
                I'll post some pictures later in the week of some pages from an 8 x 8 album I started making for my daughter. Have to wait for daylight to take pics, as the lights in my home wreak havoc on the true colors of the papers and inks!

                I did post this card to Hero Arts gallery a couple of weeks ago for their monochromatic challenge.  Don't get too upset with me that it's a winter card! I know, I know, we really haven't had much of a summer here in upstate NY, blah, blah, blah, I know. BUT, fall is on the horizon, and winter will follow. Can it ever be too early to start thinking (dare I say it) holidays?

                The Hero Arts stamps I used are all from the clear set CL234 Winter's Butterfly! I love, love, love this set. The snowflakes are all individual, and you can arrange and stamp them any way you want. I added some gemstones, and highlighted with the Stardust Gel Pen. A little sponging and distressing, and it was done. I did a similar card on blue papers, with blue ink, and highlighted with a white gel pen.  The possibilities are endless.
                So, I hope I didn't scare you off with the winter card! I promise I will bring it back to summer, well, late summer, and early fall, in my next post.

                If you are following me from my old website, this is where you will find me now. I have replaced it with this blog/website. I will be able to post more often here, as it's a lot less work than maintaining a website. 
                If you would like to read some of my writing on HubPages, just follow this link and you will be able to read any or all of my hubs (articles):
                http://hubpages.com/_quhng16s2trb/profile/DoodleLyn

                I love feedback, and welcome your comments here or on my HubPages pages articles.  If you would like to comment on this post, just click the box down below that says "comments."

                Blessings,
                     lynda