Showing posts with label birds. Show all posts

Wednesday, December 30, 2020

Impression Obsession Old Is New - Watercolor Winter Bird


Today we are featuring some of Impression Obsession's older stamps on our blogs.
 
I had no idea what a titmouse looks like, so I did my usual Google search to see what colors they have, and any other information that would be helpful to me for coloring him/her.  The titmouse is a tiny little bird. From the photos I found, they are blue and gray, with touches of a rusty orange and white on the breast and white around the eye.  The eyes are very large for such a small bird.

IO Stamps Links:

How I made my card:
  • On watercolor paper, I stamped the Titmouse image, using pale light gray archival ink.
  • I water colored the bird and branch with Kuretake Gansai Tambi water colors.
  • For the background, I wanted to go with a loose idea of a winter sky.  With a large paint brush, I brushed watercolor onto the bird panel.  I had masked the titmouse and portion of the branch.
  • I used vintage photo and wild honey distress inks to distress the edges of the panel.
  • I stamped the Take Care verse with archival ink.  I used a light gray, over a blue.
  • I spattered some white acrylic paint onto the panel, then attached it to an A2 card front. OK, for full disclosure on this, see the Bonus Tip below.
  • INSIDE:  I used the practice piece I had created when I tried out colors for the sky, and distressed the edges.
  • I stamped the branch part of the titmouse stamp with gray around the upper edges, then attached it to the inside of the card.
INSIDE

I hope you like my card.  It was a challenge for me.  I have often heard water color artists say that their work looks like a hot mess at a certain point.  Yep, that's what happened.  BUT, they said to persevere, because eventually it will all turn out ok.  So, not to be daunted by my trash-worthy project, I kept at it.  And in the end, I think it came out ok.
 
Be sure to visit the other participating designer's blogs for more inspiration using some of our older stamps.  You can find links to their blogs on the IO post HERE.
 
Bonus tip:  If you ever put black spatters on your card, and really meant to put white, well, I have a solution.  Wait till the black paint dries, and add white acrylic paint right over the black spatters, using an embossing stylus with a rounded tip.  Ask me how I know!  The black spatters were really soooo wrong, and ruined the entire card.  So, I tried the white over them, figuring I had nothing to lose. It worked.  Phew!
 
Thanks for visiting today.  I hope you are having a safe and happy holiday, and I wish you who are on my side of the world a very Happy New Year!
 
Blessings,
 

Saturday, July 4, 2020

Penny Black Saturday Challenge - Nature

Happy Saturday!  And happy Independence Day July 4th to all my American friends!   Today starts the new Penny Black Saturday Challenge.  The optional theme is Nature.  I chose to use birds on my card today.  I have been enjoying watching the birds in my backyard garden this summer, so I am inspired to use them on my nature card.
Penny Black stamps:

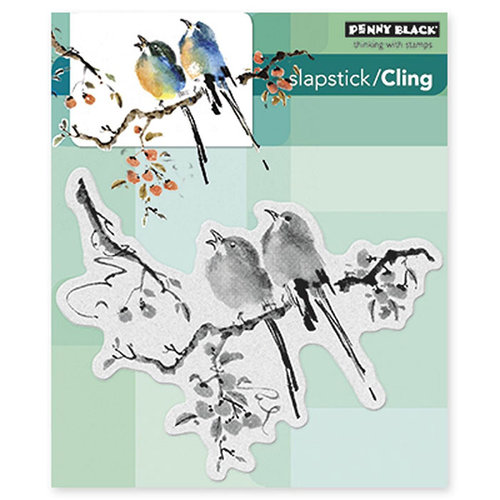
I stamped the birds on branch image,The Sweetest Sound,  onto watercolor paper in my Misti.  I used Arteza Real Brush Markers to 'ink' the image.  I added more blossoms to the branch with the markers.

I added some color to the background by brushing some color from the real brush markers onto a ceramic palette  then using a water brush to add some watered down color to the background.  I then added some images from some older PB stamps for background interest.

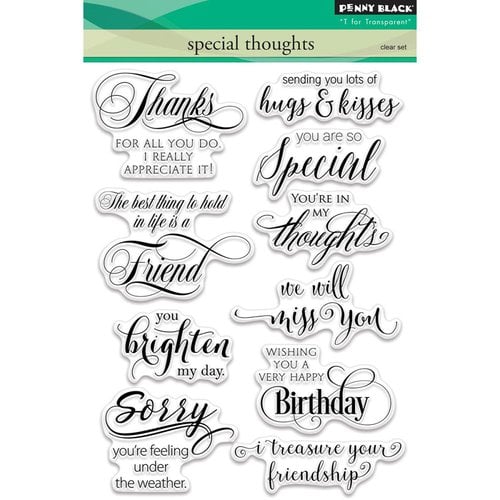
I used VersaFine Clair Nocturne ink to add the verse, from the Special Thoughts set.  

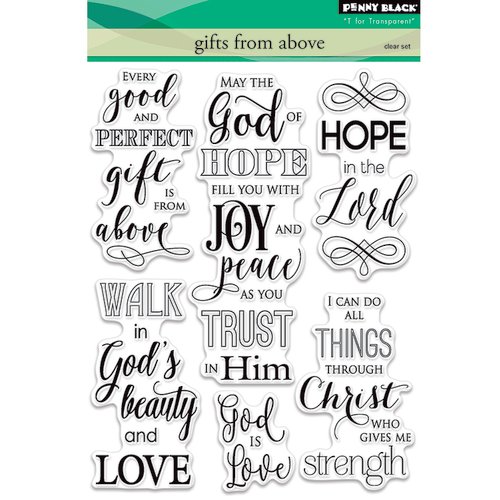
Inside, I used the Gifts From Above set.  I thought this verse was inspiring for these times in which we are living.

I hope you are inspired to join us in the fun at the Penny Black Saturday Challenge this month.

Thanks so much for visiting today.  I appreciate you comments.

Blessings,


Monday, March 9, 2020

Die Cut Obsession Day At Impression Obsession - Tend The Little Things


There are lots of fabulous dies at Impression Obsession.  Today dies are in the spotlight for our Die Cut Obsession feature.  Be sure to check out what our designers have made today.  You can find today's participants at the Impression Obsession blog HERE.

I have a sweet spring card for my project today.
INSIDE
IO Dies/stamp links:
DIE927-B Heart & Home 
DIE055-N Leafy Branch 
DIE154-A Small Bird Set 
B13862 Tend Little Things 
CC395 Shiplap Cover-A-Card 

As you can see, I have used lots of smallish dies on my card.  I started with a background I had created with the Shiplap Cover-A-Card  stamp.  I had a scrap of it left over from a previous card, so I cut the Heart & Home  bird house from it. I cut the Leafy Branch from green card stock, and the Small Bird Set from red card stock.

I created a small rectangle of color by taping off a rectangle shape with painter's tape on a panel of white card stock.  I used my distress ink with daubers to apply greens and blues inside the taped shape.  I removed the tape , then spattered some water for some interest.  

I assembled the die cut pieces in a composition over the background I had created on the cream card stock panel., and layered it with other panels onto an A2 light gray card front.  I added the Tend Little Things  verse.

I assembled some extra pieces inside the card to carry the theme through. 

I hope you are enjoying our Monday die cut feature.  Thanks for visiting my blog today.

Blessings,
 
 DIE927-B Heart & Home
https://shrsl.com/25pb0

DIE055-N Leafy Branch 
https://shrsl.com/25pb4


DIE154-A Small Bird Set 
https://shrsl.com/25pax

B13862 Tend Little Things
 

CC395 Shiplap Cover-A-Card 
https://shrsl.com/25pb6

Tuesday, October 1, 2019

Technique Junkies October, 2019 Stamp Release Celebration


Welcome to the Technique Junkies October Release Day! 

All of the October 2019 New Release stamps 
are 15% off through October 8th!   
You don't need a code, just add them to your cart 
and the discount will be applied when you check out.

AND, if you use my code, TJ10Lynda, you will get an additional 10% off.
That's 25% off the new release items 
through October 8th when you use my code!

I have three cards for your inspiration today. 

Card 1 - Joyeux Noel Cardinal

I stamped the Cardinal  image onto gray card stock, and colored it with Faber Castell Pitt Pastel pencils and pastel sticks.  I added the lines of the image back in after coloring, as the pastels do cover them up quite a bit.  

I used an 01 Micron pen for this step.  I could have left the image in my Misti, and colored it there, then overstamped it again when finished, but I removed it before thinking of that.


I drew in some branches in the background with the pastel pencils, and smudged them to blur them, so they appear in the distance.

For the verse, I used the Joyeux Noel from the Victorian Greetings set, stamping it with festive berries distress ink onto a scrap of gray, then cutting it down.

I added the image with foam tape to a gray A2 card, then   added a die cut frame from a darker gray.  I added the verse, and a button with some string tied through into a bow.

Inside:


Card 2 - Poinsettia Happy Holidays
Stamps:  Poinsettia Set of 4 SS099
              Victorian Greetings Set of 6  JT030

I stamped the Poinsettia images onto white card stock, and colored them with colored pencils.  I use Polychromos, as I like to add lots of layers, and these pencils take the layering beautifully, without building up a waxy bloom that prevents you from adding more color or layers.

I fussy-cut the images and set them aside while I prepared my card layout.  On an A2 card I added a layer of ivory card stock.  On another, slightly smaller, panel of ivory card stock, I added a coral panel with string and bow, and another lighter coral pp.  Onto that, I added die cut circles and frame.  I added the fussy-cut poinsettias to this arrangement with foam tape.  

I stamped the verse from the Victorian Greetings set onto a scrap of the ivory, lined it with coral, and added it with foam tape.

Some clear drops from Studio Katia finish off the card front.

For the inside:


Card 3 - Mischievous Kitty Under Christmas Tree
Stamps:  Meowy Christmas JT029
              Christmas Ornaments Trio Set of 9 (verse)

I stamped the Meowy Christmas image by inking it with various colors of distress inks.  I used distress inks to watercolor the images.  I did this in my Misti, so that when it had dried I restamped the image to bring back the lines.

Some colored pencil shading and highlights finish off the coloring.

I stamped the Merry & Bright verse from the Christmas Ornaments Trio Set of 9 with VersaMark Nocturne ink, and embossed it, then cut it out and added it to the card.

Some layering with various card stocks, gold pearl embellishments from Studio Katia,  and that was that.

Be sure to visit the other designer's posts by clicking on the links below for more inspiring creations:

Technique Junkies Blog
Beth Norman-Roberts ‎
Ceal Pritchett
Giovana Smith
Holly Brown
Janine Tinklenberg
Jeanne Streiff
Judy Jackson
Kia Gibson-Clapper
Lee Ann Barrett
Lynda Pleckan
Pat Huntoon
Ro Donner
Stephanie Severin

I hope you like my cards, and are inspired to make something beautiful today!  Don't forget to use my code, TJ10Lynda, for 10% off your entire purchase, including 10% off the already discounted release stamps through October 8th.
Thanks for visiting my blog.  I appreciate your time and your inspiring comments.

Blessings,


Monday, August 5, 2019

Impression-Obsession Die Cut Obsession - Birdhouses


It's time for Impression-Obsession's Die Cut Obsession!  We are featuring dies on our design team blogs today.  You can find links to the other designer's blogs HERE on the IO blog.  And here is my card....
Links to dies/stamps:
DIE156-H Birdhouse Set
DIE154-A Small Bird Set
DIE055-N Leafy Branch
DIE836-V Tag WithTags
Some Birdie's Thinking B5577
Birdcages F2336

I had so much fun creating this card!  One of my favorite color combos is pink and green, so I used these colors.  I lined an A2 card with patterned paper, then cut another coordinating sheet with a die from the Tag With Tags set, and attached it over the previous piece. 

I cut the birdhouses from the Birdhouse Set, and colored them with Copic markers, then added them to the card front.  I also cut the Leafy Branch, coloring it with Copics, and added it, along with some of the birds from the Small Bird Set.  

I dyed some string with my Copic markers, and added that with some bows to 'hang' the green bird house.  Did you see the little birdie poking her head out to say hello?


I used the tag from the Tag With Tags die cut to add the verse, which is from an older IO set in my stash.


INSIDE:
I used the negative of the Leafy Branch die cut as a stencil to brush some green color for leaves, then added the dies with one of the Birdcages stamped on it.  
I love how the little scallops lift up on the Tag With Tags circle die cut!
  That's it for my card today.  I hope you enjoyed it, and are inspired to create something beautiful today!
 
I appreciate you taking the time to stop by today.  I look forward to your comments.

As I finish this blog post, on my back yard deck, the birds are singing and visiting my bird feeders.  It's a lovely summer Sunday afternoon, with a gentle breeze and oodles of sun!  I love creating and blogging in my garden paradise!  So much inspiration here!

Enjoy your day.

Blessings,

Thursday, July 11, 2019

Clothed With Dignity

Hello!  It's time for another Impression-Obsession challenge.  Today's challenge theme is 'Things that fly.' 
Stamps:  Goldfinch 12190CL (Serendipity)
              Hope Set WP990
              Eucalyptus Stem 2  E20751
              Eucalyptus Stem 1  D20752
              Berry Branch E20765
Die:        Scalloped Stitched Circles DIE831-YY

I started with a light green A2 card, and stamped the stems and branch onto it, using my Misti.  I did go over the images with colored pencils to create more highlights and shading.  I brushed some Shabby Shutters ink around where the bird image was going to go.

I stamped the bird image onto Strathmore mixed media card stock, and colored it with colored pencils.  I used a die from the Scalloped Stitched Circles to cut it out, then distressed the edges with the same ink.  I attached it with foam tape for added dimension.  
 Inside:
 

I stamped the verse from the Hope Set on the front, then stamped parts of the set on the inside and colored it.


I hope you like my card, and were inspired to join our challenge.  You just might win a gift certificate to the IO store!  
Be sure to check out the other designer's blogs for more inspiration.  You can find their links on the IO post HERE. 

Thanks for stopping by.  I appreciate your visits, and your lovely comments.

Blessings,

Thursday, May 23, 2019

Feathered Friends Challenge At Impression-Obsession

Welcome to the Feathered Friends Challenge at Impression-Obsession.  The design team has been busy pecking away on our bird cards.  You can find links to all the designer's cards, along with details about the challenge, on the Impression-Obsession blog HERE.

For my card today, I used one of the Summer release stamp sets, Hummingbird.
IO Stamps:
Hummingbird WP937
Life Stuff Sentiments CL491
Special Day D20728


I started by stamping the flowers from the Hummingbird set onto Canson XL watercolor paper.  I colored my flowers with my Arteza real brush markers.  I'm over-the-moon with these vivid hues and color ranges of these markers.  The brush tips are larger than Zigs, but they come to a sharp point for getting into those pesky detail areas easily.  They blend effortlessly together.

After stamping and coloring the base panel, I stamped the image again, and cut it out with a circle die.  I cut it so that the wing portions were spilling outside of the circle.  To do this, I placed the die on the image, then drew pencil lines where the wings were.  I then fussy-cut the wings up to the pencil line.  Then I aligned my die, making sure the wings were on TOP of the die when I put it through my Cuttlebug.


I colored the bird and flowers that were on the circle with the same Arteza markers.  I stamped the Happy Birthday verse from the Life Stuff Sentiments CL491  onto the circle above the hummingbird.  To make the verse form around the circle (it is straight in the set), I molded it as I added it to my Misti top plate.  I distressed both panels with bundled sage distress ink.

I added the hummingbird circle to the main card panel, lining up the images so they match with those on the card.  I used my craft knife to cut some of the flowers on the main panel so that they would lift and curve over the circle. 

Inside, I stamped the flowers and colored them with colored pencils.  I added the Special Day verse.


I hope you will join us in this fun challenge.  You have until June 4th to enter your card/s.  The prize is a $25 gift certificate to the IO store.  And, if you win, your card will be featured on the IO blog.  So, what are you waiting for.  Come on over and play! 

I am entering my card in these challenges:
Addicted To Stamps - Make your mark
Allsorts Challenge - Birthday (Their 10th! - Happy Birthday!) 
Little Red Wagon - Flower frenzy
Simon Says Wednesday Challenge  - Bright colors moodboard
Watercooler Challenges  - All about occasions


Thanks so much for stopping by today, and your lovely comments.

Blessings,