Showing posts with label trees. Show all posts

Monday, February 18, 2019

IO Die-Cut Obsession - Fir Trees


Dies are in the spotlight today on the Impression-Obsession blog.     I have a couple of cards to share with you, which use the Fir Trees DIE084-V.  I used the dies a couple of different ways. 

Card 1:
On my first card,  I smooshed distress inks onto some Strathmore bristol card stock.  I added Technique Junkies' Harvest Sunset Shimmering Bliss, and smooshed again.  When dry, I cut it down to A2 size, and distressed the edges, and put it aside to dry.

I die-cut two of each tree from the Fir Trees DIE084-V set from Canson XL watercolor paper, and painted them using darker distress inks, and a bit more Shimmering Bliss.  I also cut some from some gold paper I've been hoarding, and some shimmery white vellum, as I wanted to brighten it up a bit.


I arranged the die-cut trees on the panel, attached the verse Gentle Thoughts C13767, then attached the whole shebang to an A2 card.  

I added some splatters of the Shimmering Bliss spray by putting some on my palette, then flicking it on with a brush.


And here is the inside of this first card....


Card 2:
I die-cut the trees Fir Trees DIE084-V from a piece of acetate to use as stencils and masks.  I rubbed Caran D'Ache Neocolor II watercolor crayons, in shades of green and blue, onto watercolor paper.  I added water, and used a water brush to activate the crayons to manipulate the colors.  


When dry, I placed the acetate sheet from which I'd cut the dies onto the panel.  I dampened a towel lightly, and dabbed and rubbed through the opening, removing some of the crayon color from the piece, repeating intermittently on the piece.  Then I placed the acetate die itself onto the panel, and sponged some color around it.  I added more intense color through the opening in the acetate again, and sprayed blue and green Shimmering Bliss through the openings, as well. 


A final spritz of Tattered Angels Glimmer Mist gave the whole panel an intensely sparkly, shimmering finish.  The Glimmer Mist doesn't add color, just amazing shimmer, so the colors shine through.  I wish you could see this in real life!

 I added a panel that I had completed in the same fashion, on which I stamped the IO verse, Art of God C5055 with VersaFine Claire Nocturne ink. 

And for the inside:


We are really having fun with these Monday projects for your inspiration.  
Be sure to check out the other designers' blogs for more die inspiration.  Details are on the IO blog HERE.  


IO dies and stamps:
Fir Trees DIE084-V
Gentle Thoughts C13767
Art of God C5055


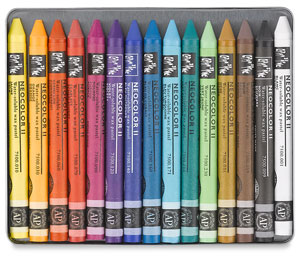
Caran d'Ache Watercolor Crayons 
http://shrsl.com/1gb0t
 
Thank you for stopping by.  I hope you are finding lots of ideas from our cards and projects.  

Blessings,

Monday, November 12, 2018

Sending Cheer Snowy Scene

As fall gradually gives way to winter, I'm thinking snowflakes and snowy scenes for my cards.  Our 'snowbirds' are leaving, or have left, for warmer climes.  We are staying put, preparing for the cold and snow.  I am choosing to focus on the positive...the pretty snowfalls, warm fires, comfort foods, gatherings, and more time spent home with family and friends.
I love when the sun is low on the horizon, and it's snowing those great big airy flakes, that seem to dance as they float to the ground.  The sky is multi-colored as day creeps toward late afternoon.

For my card, I used stamps from Impression-Obsession.  For the  scene, I placed the WINTERY DAY stamp into my Misti, and inked it with Range Archival inks.  I repeated the stamping as necessary to layer colors.

For the background, I brushed distress inks onto the sky area, and a little on the snow below to reflect the sky.  I also brushed some 'snow' onto the tree branches with the white acrylic paint.

For the verse, I used one of the verses in the LAYERED PINECONE stamp set. 

A few spatters of watered-down white acrylic paint, and some distress ink along the edges, and some layering, finish off the card.

I am adding my card to these challenges:
Addicted To Stamps  - Make your mark
Make My Monday - Winter foliage
The Daily Marker 30 Day Challenge

Thanks so much for spending time with me today.  I appreciate your visits and your comments.

Blessings,

http://shrsl.com/19zn7


http://shrsl.com/19kme


Monday, December 18, 2017

Christmas Trees!

I have a couple of more Christmas cards using the Technique Junkies Christmas Trees Set of 6  and the Gifts of Christmas Set of 5
For this card, I created the background on watercolor paper, using Tim Holtz distress inks.  I taped down the paper, then wet it all over with a mop brush and lots of water.  Then I dropped in blues, purples, and green inks and let it interact with each other and with the water. 

When the background was dry, I cut it to size, and embossed the trees using Judi Kins Black Opal embossing powder.  This powder has lots of sparkles of fiery colors in with the black that look amazing in real life.  I tried to capture it here...
For the strip along the top, I embossed a piece of card stock and cut it and layered it onto the card.  I embossed the verse in regular black embossing powder.  I added some dots with an embossing marker, and drew a star, then added silver embossing powder in the sky.

For my second card, I used Tim Holtz distress oxide inks to create the background, then embossed the trees in black embossing powder. The stars are from a sheet of sticker Peel-Offs.  I die cut the pieces using a Spellbinders die, and created the banners for the Merry Christmas from the left over pieces of the panel I had created for the background.
I hope you are enjoying the holiday season and all the festivities.  I love this time of year when everyone seems a bit happier, more jolly, and shares the Christmas spirit.

Thanks for stopping by today.  Be sure to stop over at the Technique Junkies blog and check out the challenge.  
You have until January 14th to enter to win a $25 Technique Junkies gift certificate!!  You can see details and enter the challenge HERE.

Also, get 10% off your stamp order by using my code TJ10Lynda.

Thanks for stopping in.  Have a wonderful week before Christmas!

Blessings,

lynda joy

Wednesday, December 6, 2017

Winter Wonderland Technique Junkies Style

Hello Junkies fans!  I have a couple of cards today....
I couldn't help but sing 'Walking in a winter wonderland' when I was making these cards!  The scene reminds me of the snowy fields behind the house I grew up in, out in the country.  It was a chore just to walk a few steps in the kind of snow we used to get.

To create my scene, I used a piece of watercolor paper and my Distress ink minis.  I inked up my first tree from the Christmas Trees set of 6, then misted it lightly by holding it over my aromatherapy misting diffuser.  I keep this diffuser on my desk while I work for it's calming, soothing effects.  I thought, hmmmm, that's a pretty good dose of mist coming from that thing....it beats huffing on the stamp.  So I tried it, and it worked!!  Just the right amount of moisture for a good image. 
Holding my inked stamp over the mist from my aromatherapy oil diffuser
I then stamped it onto the watercolor paper,  using a water brush to manipulate and obscure the ink, to give it a watercolor look.  I let it dry a bit, then inked and repeated again, over the initial image.  

Now, you may notice that my trees are a little taller than the stamps.  I made them look that way by 'walking' the stamp downward as I stamped it, keeping pressure on the base of the stamp.  This created the impression of taller trees!  I used the wet brush again, and continued in this fashion until I achieved the look I wanted.  Repeated for the rest of the trees.

When dry, I punched a circle from a paper scrap, and used it as a template to ink my moon, using ColorBox silver pigment ink, and a sponge finger dauber.  I spread the silver around a bit, to give the feeling of moonglow over the trees.

Some quick watercolor strokes for hills, and some spatters for snow (I used white acrylic paint, then some white India ink).  I added some tiny stars from my stash, and a pretty silver ribbon.  Layered it onto silver paper, then onto a white card base.  I gave it a quick spritz of Tattered Angels Glimmer Mist to give it a shimmery glimmer, which is so pretty in real life!
Closer view of moon in the trees
Stamps:  Technique Junkies Christmas Trees set of 6
               Technique Junkies Gifts of Christmas set of 5

I used the same stamps on this second card....
I kept this one a little simpler.  Same technique.  For the snow banks, I tore the paper and layered it on the bottom.

Stop by the Technique Junkies Stamps store.   There are some fabulous stamps there.  If you find some holiday stamps, or any, that you just have to have, please use my discount code (TJ10Lynda) and get 10% off your order!
I am adding my card to:
Make My Monday Challenge - Happy Christmas!
Mod Squad Challenge - What a Flake!
Splitcoaststampers Ways To Use It Challenge - Try A Tutorial

Thanks so much for stopping by.  I hope you found some inspiration here!

Blessings,

lynda


Sunday, July 17, 2016

Within your heart.....

"Within your heart keep one, still, secret spot where dreams may go...."  I love this quote by Louise Driscoll.  I thought it would be a perfect quote addition for my friend's quote easel.
 As I looked through my stamps, my eye went right to the Magenta tree and fence stamp for the main image to go with this quote.  I inked it with TH distress inks, lightly spritzed it, and stamped it onto a panel of watercolor paper.  The script background is from my stash, but unfortunately I do not know the manufacturer, as I had removed the rubber from the block! A quick swish around the stamped panel with my violet Clarity brush, and a stitched die cut finished the panel.  I layered it onto green card stock, trimmed it to 1/16 inch, then onto blue/violet card stock, trimmed to 3/8 inch.  I adhered it onto a white panel, which I had swished with the Clarity brush, then onto a green backing.

The quote stamp is from Penny Black (2711F).  I stamped it onto a watercolor panel which I had die cut with the stitched die, brushed the edges, and stamped the verse.  I secured it to the base with craft foam for dimension and interest.  

The swirl die cuts are from a Spellbinder's die.  Finally, I added some opalescent sequins, just because I couldn't help myself.  Chuckle.

I believe it is day12, or is it 13, of the The Daily Marker 30 day color challenge, so this card is for that.  I am also adding it to these challenges:

Simon Says Stamp Wednesday Challenge - Create A Scene
Addicted To Stamps Challenge - # 202 Make Your Mark
Little Red Wagon - It's Summertime

Now we are off to spend a relaxing afternoon with friends.  Hope you have a simply lovely day!

Blessings,

lynda

Saturday, April 23, 2016

Dreamweaver Trees Stencil - Three Cards

The old adage, "one person's trash is another's treasure," certainly rings true.  I rescued this Dreamweaver tree line stencil from my friend's waste basket during one of our stamping sessions a while ago.  Today, I thought I would challenge myself to make a card or two.....or three!  Here is what I came up with.....
I used distress inks with my Clarity Stamp stencil brushes through the stencil, onto light kraft card stock.  The die is from Simon Says Stamp, along with the verse (die - Wishing SSSD111423; stamp - Sending & Wishing set SSS101475).  A few dots with my white Signo pen finish this one.

This one I embossed, and it really came out pretty raised, although it doesn't show in this picture.  I embossed it on light gray card stock, then used my brushes to swish some pumice stone distress ink onto it.  Added Simon Says Stamp With Sympathy SSSD111360 die.  I punched some dots from the same card stock and added them for a little interest.

Finally, I watercolored a panel using the smoosh technique and dried it with my heat tool and set it aside.  Then I took the stencil and dabbed black soot distress ink directly onto the stencil, gave it  a little mist of water, then turned it ink-side-down onto the watercolored panel.  The ink beaded up a little on the stencil, because it is metal, but it came out pretty clear.  I just filled in the missing spots with my black soot distress marker.  I did leave the leaves part of the stencil sketchy, and I like the look of the leaves that way.  Printworks PW Borders Q045 set has this Love You stamp, which fits perfectly in between the two trees.

So, I had fun in my craft room this afternoon.  Three different looks from the same stencil.  I wonder if Arlene is going to want her stencil back now!

Thanks for stopping by!

lynda