Two-Page "Sisters" Layout
If you're here for Technique Tuesday, please scroll down one post.
I'm slowly getting my pages photographed, and up on the blog. Here's one of my favorite two page layouts of the weekend crop I attended a couple of weeks ago. It's a "sisters" layout, featuring, of course, the loves of my life, my granddaughters. Keeley just turned six, and Kennedy is 4 months now!! Time sure does fly by quickly! Click on each page to see details larger.
I used some older Basic Grey papers....just love the colors! For the large "S" by sisters, I covered a chipboard letter with the blue Basic Grey paper, then distressed the edges, and added a ribbon with heart shaped paper clip.
I'll be back with more. Until then, enjoy your evening!
Blessings,
lynda
Get comfy, pour your favorite beverage, and prepare to indulge your creative side with me. My philosophy is simple: Follow your heart, and inspiration will find you. Be yourself.
Wednesday, March 30, 2011
Tuesday, March 29, 2011
Technique Tuesday - Paper Napkin Background Paper
Making your own patterned paper for your card
I'm reaching really far back to an old technique for today's post. I taught this class at my store at least ten years ago!! It's using a paper napkin to create patterned paper. Here's the card I made from mine, followed by how to do it:
Now for the tutorial:
I cut a couple of the flowers from parts of the napkin I didn't use for the card front to overlap the verse panel. I added highlights with the Stardust clear gel pen for a little sparkle (click the images to see closer). A little distressing, and pretty bow finishes it off.
The stamps are from Our Daily Bread. The Spellbinder's template is exclusive to ODB, and can be purchased through their website individually, or as a bundle (bundled together with stamps).
I have entered this card in the Our Daily Bread challenge this week, which is to use a frame on your card. Check out the challenge and other Design Team entries on the ODB blog here .
Thanks for stopping by.
Blessings,
lynda
I'm reaching really far back to an old technique for today's post. I taught this class at my store at least ten years ago!! It's using a paper napkin to create patterned paper. Here's the card I made from mine, followed by how to do it:
Now for the tutorial:
- Start with a pretty party napkin. I thought this one was a really great one to use for a background.
- Most decorative party napkins are two-ply. You need to separate the layers, and you will be using the top layer (the part with the design).
- Make a "sandwich" using the napkin, a piece of plastic wrap (any brand) cut to at least the size of the napkin, and finishing with a piece of card stock.
- Using an iron on medium high setting, no steam, press the "sandwich" until the plastic melts, fusing the napkin to the card stock.
- Use the "patterned paper" you just made as a base for your card! Just cut it to fit on whatever size card you are making. This one is an A2 card. That's it! Here's what it looks like after mounting it to an A2 card, and before I finished making the card from it.
I cut a couple of the flowers from parts of the napkin I didn't use for the card front to overlap the verse panel. I added highlights with the Stardust clear gel pen for a little sparkle (click the images to see closer). A little distressing, and pretty bow finishes it off.
The stamps are from Our Daily Bread. The Spellbinder's template is exclusive to ODB, and can be purchased through their website individually, or as a bundle (bundled together with stamps).
I have entered this card in the Our Daily Bread challenge this week, which is to use a frame on your card. Check out the challenge and other Design Team entries on the ODB blog here .
Thanks for stopping by.
Blessings,
lynda
Tuesday, March 22, 2011
Technique Tuesday - Faux Embossing
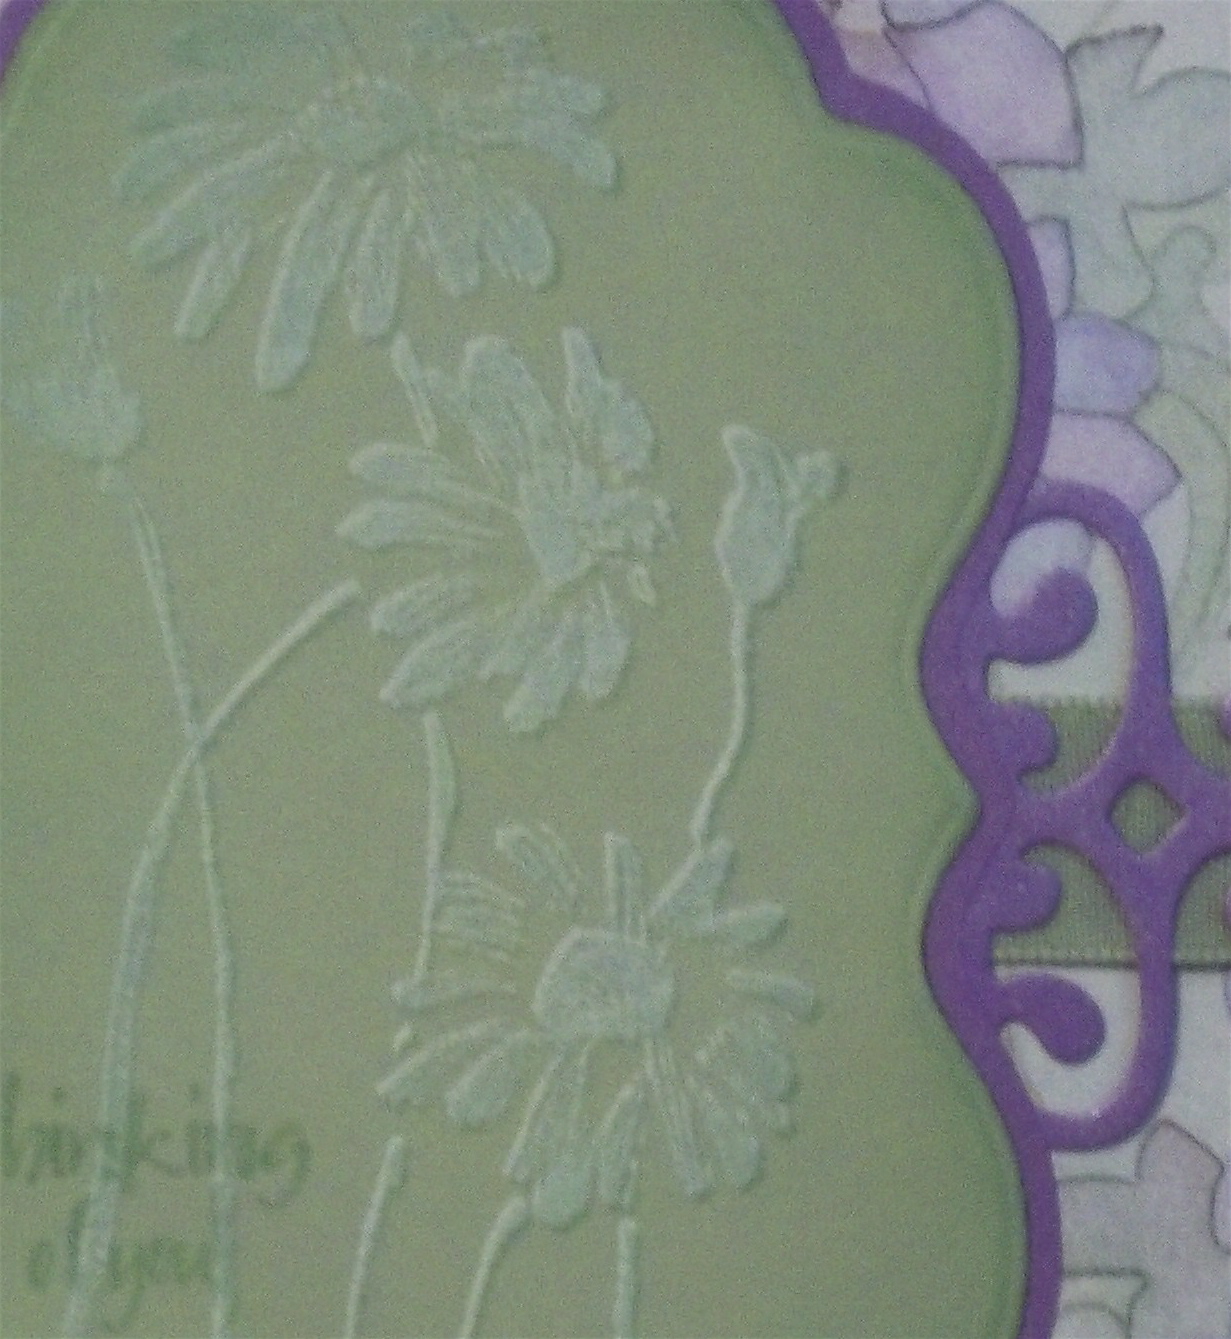
I was wandering around over on Splitcoaststampers, and came across this video by Beate Johns. This technique is so easy, and yields a look that looks like embossing. We won't be using any embossing powder, however, to make these cards. All you need is some white ink (I used white ColorBox pigment ink), a stamp positioner, and some dye ink, and a stamp!
Here is a link to Beate's video http://www.splitcoaststampers.com/resources/tutorials/3dstamping/ .
The first part of this link shows a step-by-step in pictures, then if you scroll down, you will see the video capsule. You're going to love this!
Here are a couple of cards I made with this 3-D embossing technique:
Hope you enjoyed this technique, and will give it a try. It is fun, and only requires a few materials.
I promised another scrapbook layout, so here is one I did at the crop (click images to see closer):
That's it for tonight. Bedtime for me!! Hope you're enjoying this first week of spring!
Blessings,
lynda
Here is a link to Beate's video http://www.splitcoaststampers.com/resources/tutorials/3dstamping/ .
The first part of this link shows a step-by-step in pictures, then if you scroll down, you will see the video capsule. You're going to love this!
Here are a couple of cards I made with this 3-D embossing technique:
I made this thank you card for a the Card Patterns Sketch 107 Challenge HERE . This is the sketch:
| Close-Up of 3-D embossed look |
| Close-up of embossed look |
Hope you enjoyed this technique, and will give it a try. It is fun, and only requires a few materials.
I promised another scrapbook layout, so here is one I did at the crop (click images to see closer):
| Double page layout Kennedy's Christening |
That's it for tonight. Bedtime for me!! Hope you're enjoying this first week of spring!
Blessings,
lynda
Monday, March 21, 2011
Another Two-Page Scrapbook Layout
Forgive me for posting a Christmas layout. I know, I know....you don't want to think about winter any more than I do. But I had to get these pics scrapbooked! This is a two page layout I did of the girls in their Christmas pj's:
You can click on the pages to see the details up closer.
I'm working on their Christmas dresses page right now, and should have that up shortly.
See you tomorrow with a new Technique Tuesday!
Blessings,
lynda
You can click on the pages to see the details up closer.
I'm working on their Christmas dresses page right now, and should have that up shortly.
See you tomorrow with a new Technique Tuesday!
Blessings,
lynda
Sunday, March 20, 2011
New Two Page Scrapbook Layout
HAPPY FIRST DAY OF SPRING!! And a lovely day it was, albeit a bit cold. But the SUN was shining!! In Rochester, NY, when the sun is shining, it's a good day!
I spent the day today stamping with a friend, and finished another two scrapbook pages. We had a good time, with lots of laughs, as usual. And I cooked a corned beef brisket with cabbage, potatoes, and carrots. The smell was making us so hungry and driving us mad all afternoon. I couldn't wait till dinner, but it was worth the wait. Phyllis, you should have stayed...it was yummy!!
So, I told you I'd be back with a posting of a couple of my pages. I've had a busy week, training a new girl at work, and had to work extra hours this week, then busy at home with "stuff," so I'm finally getting around to taking some pictures and getting them up. Well, two pictures, anyways. The rest will follow soon.
The subject of this first one is our newest granddaughter, Keeley Grace, on the day she was born. These pics were taken two hours after she entered the world, and the first and second day. It's a double page layout.
Here are some of the details:
That's it for tonight! I'll be back with more pics. Right now, I'm heading to the couch to cuddle with hubby before going to bed EARLY tonight! Be back tomorrow with more for ya!
Blessings,
lynda
I spent the day today stamping with a friend, and finished another two scrapbook pages. We had a good time, with lots of laughs, as usual. And I cooked a corned beef brisket with cabbage, potatoes, and carrots. The smell was making us so hungry and driving us mad all afternoon. I couldn't wait till dinner, but it was worth the wait. Phyllis, you should have stayed...it was yummy!!
So, I told you I'd be back with a posting of a couple of my pages. I've had a busy week, training a new girl at work, and had to work extra hours this week, then busy at home with "stuff," so I'm finally getting around to taking some pictures and getting them up. Well, two pictures, anyways. The rest will follow soon.
The subject of this first one is our newest granddaughter, Keeley Grace, on the day she was born. These pics were taken two hours after she entered the world, and the first and second day. It's a double page layout.
Here are some of the details:
| Embossed panel |
| Vellum over lettering for soft look |
| Journaling |
| die cut label, photo corners and crystal swirls |
| Photo on tag, brad, crystals, and safety pin |
Blessings,
lynda
Tuesday, March 15, 2011
Technique Tuesday - Stamping with neutral colors
This week's technique is inspired by a challenge over on the Flourishes Blog . Their Time For Neutral Beauty challenge is to make a card using no colors, just neutrals. This is difficult for me, as I love COLOR! But, hey, that's why they call it a challenge, right?
So, here's my card. I invite you to play along with this challenge here on the Flourishes blog.

I chose some Ranger Distress inks in old paper, brushed corduroy, and frayed burlap.
I began with watercolor paper and a light wash of old paper ink. Next, I stamped the script stamp with the same color.
For the main image of the flowers, I rubbed the three colors of distress inks onto my craft mat, close together, but not touching. Then I inked the stamp by tapping it into the areas of ink on my craft mat. I spritzed the stamp with water, then stamped it onto the background.
I added the triangle rows and the swirl stamps to give the card an artsy collage feel, then distressed the edges, mounted it onto some white textured card stock, and tore the edge. I stamped the triangles and thank you on the bottom, added the ribbon and flowers, and some pearls to finish the card. All stamps are Penny Black.
This challenge is open until March 31st, so get out your neutrals and come on over and play!
I was away at a scrapbook crop over the weekend. We had a fun and energized three days of scrapping, sharing, laughing, and more scrapping. I will share some of my pages later this week, so check back. And I kind of enjoyed making a neutral card, so I just may try another one of these for teh challenge, as well.
Blessings,
lynda
So, here's my card. I invite you to play along with this challenge here on the Flourishes blog.
I chose some Ranger Distress inks in old paper, brushed corduroy, and frayed burlap.
I began with watercolor paper and a light wash of old paper ink. Next, I stamped the script stamp with the same color.
For the main image of the flowers, I rubbed the three colors of distress inks onto my craft mat, close together, but not touching. Then I inked the stamp by tapping it into the areas of ink on my craft mat. I spritzed the stamp with water, then stamped it onto the background.
I added the triangle rows and the swirl stamps to give the card an artsy collage feel, then distressed the edges, mounted it onto some white textured card stock, and tore the edge. I stamped the triangles and thank you on the bottom, added the ribbon and flowers, and some pearls to finish the card. All stamps are Penny Black.
This challenge is open until March 31st, so get out your neutrals and come on over and play!
I was away at a scrapbook crop over the weekend. We had a fun and energized three days of scrapping, sharing, laughing, and more scrapping. I will share some of my pages later this week, so check back. And I kind of enjoyed making a neutral card, so I just may try another one of these for teh challenge, as well.
Blessings,
lynda
Wednesday, March 9, 2011
Craft Room Under Construction
Just a quick post to let you know that my craft room is undergoing a transformation and is under construction, so today's Technique Tuesday is postponed. Things are looking good, and it's almost done, so I should be able to get back to work after I return from the weekend's crop I'm attending from Friday through Sunday.
I will post when I return, and Technique Tuesday will return next week.
Enjoy your week.
Blessings,
lynda
I will post when I return, and Technique Tuesday will return next week.
Enjoy your week.
Blessings,
lynda
Tuesday, March 1, 2011
Technique Tuesday - Using Those Scraps Up/Simple Card
I just can't make myself use that gorgeous paper!
How many times have you thought this to yourself? I know I'm not the only one, because I've seen you in the forums, complaining about the same thing! I have even said it out loud! Yes, I'm guilty! I have hoards of papers that the thought of cutting into gives me palpitations. Yet, there it sits, pristine and lovely. I think part of it is knowing that once I cut into it, the left over pieces will not be large enough to use for anything else, and then they will have to go into the *gasp* dreaded scrap pile.
With the help of my friend, Arlene, I am starting to realize that 1) I have way, way, way too much paper; 2) I will never live long enough to use it all (even if I used a sheet a day for the rest of my life; and 3) It does no one any good just sitting in my craft room. So, I have begun the process of "weeding out" my scraps and other items taking up space in my work room. This is a horrendously difficult thing for me. Being from the baby boomer era, we were always taught to not waste things, and to use every bit of something, and to save (remember the 'eat everything on your plate' philosophy?).
Nonetheless, recently, several bags of itty bitty scraps left my room to take up space in someone else's work area. Some went into a craft box for Keeley to play with when she stamps with Nana (me), some went to a donation box, and some even went into the recycling bin. I know, I know, the horror of it. Hubby even had to put some in our neighbor's bin so that ours weren't so full after I cleaned and sorted my room! I reasoned that even if I wanted to use those scraps, I would never be able to find them in the huge piles they were in. My once unruly stash of cards stock is finally all neatly sorted by color, each color having it's own bin in those 24 slot paper bins (I have six of them). In each color category, the scraps that I did keep are on top of the full sheets, thereby allowing me to use those before cutting into a new sheet when I just need a piece, and enables me to find them when I need them. Loving life!
My patterned paper, however, is a different story. I did organize that better, and can now put my hands on just about any pattern/manufacturer I need, BUT, I haven't been able to part with my scraps as readily as I did my card stock itty-bitties! It's just so pretty! I am starting, however, and I'm a determined person once I start something. Again, it goes back to that 'don't throw anything out/use it all or save it for a rainy day' mindset I like to blame on my parents. Hey, ya gotta blame someone! But, just as we are now learning that telling your child to 'eat everything on your plate' is not necessarily a good thing (can lead to overeating, obesity, yadda, yadda), I feel the 'save it for a rainy day' philosophy is highly overrated. And theolder more mature I become, the more I lean to the 'use it, use it now' way of thinking. So, look out pretty paper scraps, HERE I COME.
Now that I've had my ranting, here's today's card. Someone actually asked me to write about ideas for using scraps, really. I will have more in the future, but for now, here's a card made with scraps left from one of my favorite papers. Don't you just love that Asian paper and the yummy gold crinkled paper?
The pocket is actually a piece of gold pp that I cut into a rectangle, then cut a 'v' shape for the pocket bottom, then folded under the top, sides, and bottom, and adhered it to my card stock panel. I lined the panel with my gold leafing pen to carry out the gold from the pocket. Before attaching my 'pocket,' I wrapped some gold cording with some flower punches woven through around it.
The 'handkerchief' sticking out from the pocket is from one of my most beloved pieces of pp. It's actually two scraps, which I trimmed so they were rectangular, then folded them to resemble a folded hanky. I tucked them into the 'pocket' for a simple and easy card. NOW, to make myself give it away...that's something else I have to work on!
Now, I'm off to my dining room table, where I have piles of patterned papers, photos, and several scrapbook layout sketches I worked on over the weekend. My goal is to get all the sketches matched up with papers and their respective pictures, package them up into individual layout folders, then head upstairs to my craft room to select some embellishments, ribbons, etc. to each one, and pack them up to take on my weekend crop in a couple of weeks.
Definitely will NOT be done in time for dinner. Hopefully WILL be done by Friday evening, as my sweet little granddaughter, Keeley is coming to spend the weekend with Nana and Papa. I can't wait! Our daughter and son-in-law, and Keeley's little sister Kennedy will be coming on Sunday to get Keeley and to celebrate my 40th-ish birthday. Faith doesn't want me to cook, but I don't want her to have to cook either, so I've decided I really want a big bucket of Kentucky Fried Chicken! I haven't had that in ages, and the thought of it has me salivating! We'll get all the fixins, some wine, a cake, coffee, and I'll be happy.
I know, I'm just a party animal!
Blessings,
lynda
How many times have you thought this to yourself? I know I'm not the only one, because I've seen you in the forums, complaining about the same thing! I have even said it out loud! Yes, I'm guilty! I have hoards of papers that the thought of cutting into gives me palpitations. Yet, there it sits, pristine and lovely. I think part of it is knowing that once I cut into it, the left over pieces will not be large enough to use for anything else, and then they will have to go into the *gasp* dreaded scrap pile.
With the help of my friend, Arlene, I am starting to realize that 1) I have way, way, way too much paper; 2) I will never live long enough to use it all (even if I used a sheet a day for the rest of my life; and 3) It does no one any good just sitting in my craft room. So, I have begun the process of "weeding out" my scraps and other items taking up space in my work room. This is a horrendously difficult thing for me. Being from the baby boomer era, we were always taught to not waste things, and to use every bit of something, and to save (remember the 'eat everything on your plate' philosophy?).
Nonetheless, recently, several bags of itty bitty scraps left my room to take up space in someone else's work area. Some went into a craft box for Keeley to play with when she stamps with Nana (me), some went to a donation box, and some even went into the recycling bin. I know, I know, the horror of it. Hubby even had to put some in our neighbor's bin so that ours weren't so full after I cleaned and sorted my room! I reasoned that even if I wanted to use those scraps, I would never be able to find them in the huge piles they were in. My once unruly stash of cards stock is finally all neatly sorted by color, each color having it's own bin in those 24 slot paper bins (I have six of them). In each color category, the scraps that I did keep are on top of the full sheets, thereby allowing me to use those before cutting into a new sheet when I just need a piece, and enables me to find them when I need them. Loving life!
My patterned paper, however, is a different story. I did organize that better, and can now put my hands on just about any pattern/manufacturer I need, BUT, I haven't been able to part with my scraps as readily as I did my card stock itty-bitties! It's just so pretty! I am starting, however, and I'm a determined person once I start something. Again, it goes back to that 'don't throw anything out/use it all or save it for a rainy day' mindset I like to blame on my parents. Hey, ya gotta blame someone! But, just as we are now learning that telling your child to 'eat everything on your plate' is not necessarily a good thing (can lead to overeating, obesity, yadda, yadda), I feel the 'save it for a rainy day' philosophy is highly overrated. And the
The pocket is actually a piece of gold pp that I cut into a rectangle, then cut a 'v' shape for the pocket bottom, then folded under the top, sides, and bottom, and adhered it to my card stock panel. I lined the panel with my gold leafing pen to carry out the gold from the pocket. Before attaching my 'pocket,' I wrapped some gold cording with some flower punches woven through around it.
The 'handkerchief' sticking out from the pocket is from one of my most beloved pieces of pp. It's actually two scraps, which I trimmed so they were rectangular, then folded them to resemble a folded hanky. I tucked them into the 'pocket' for a simple and easy card. NOW, to make myself give it away...that's something else I have to work on!
Now, I'm off to my dining room table, where I have piles of patterned papers, photos, and several scrapbook layout sketches I worked on over the weekend. My goal is to get all the sketches matched up with papers and their respective pictures, package them up into individual layout folders, then head upstairs to my craft room to select some embellishments, ribbons, etc. to each one, and pack them up to take on my weekend crop in a couple of weeks.
Definitely will NOT be done in time for dinner. Hopefully WILL be done by Friday evening, as my sweet little granddaughter, Keeley is coming to spend the weekend with Nana and Papa. I can't wait! Our daughter and son-in-law, and Keeley's little sister Kennedy will be coming on Sunday to get Keeley and to celebrate my 40th-ish birthday. Faith doesn't want me to cook, but I don't want her to have to cook either, so I've decided I really want a big bucket of Kentucky Fried Chicken! I haven't had that in ages, and the thought of it has me salivating! We'll get all the fixins, some wine, a cake, coffee, and I'll be happy.
I know, I'm just a party animal!
Blessings,
lynda
Friday, February 25, 2011
St. Patrick's Day Card
What a great day for stamping and paper crafting. I was out of work by noon, and it was snowing like crazy all day. I had a quick lunch, put on a pot of chicken soup to simmer for dinner tonight, made a cup of tea, and headed up to my craft room.
A quick scan of challenges coming due told me that Card Patterns Sketch 103 is due today. Here's a picture of the sketch:
I had fun with this one. At first I didn't think I liked it, but it kind of grew on me. After all, it is supposed to be a challenge, right? So, here's my take on it:
I used Impression-Obsession stamps CL66 Luck of the Irish clear stamps. The embossing powder is silver pearl by Ranger. This shade of green is probably my least favorite color, but it seemed to work for this St. Patty's card. I think my son-in-law Dan will like it, as he is Irish all the way, so I'll send this to him and my daughter, Faith. Now I have to get going on something for the girlies. They have their father's Irish in them, and their mom's Korean....our little Irasian girls! Hmmm...better check out some more challenges!
Hope it brings you some luck!
Blessings,
lynda
A quick scan of challenges coming due told me that Card Patterns Sketch 103 is due today. Here's a picture of the sketch:
I had fun with this one. At first I didn't think I liked it, but it kind of grew on me. After all, it is supposed to be a challenge, right? So, here's my take on it:
I used Impression-Obsession stamps CL66 Luck of the Irish clear stamps. The embossing powder is silver pearl by Ranger. This shade of green is probably my least favorite color, but it seemed to work for this St. Patty's card. I think my son-in-law Dan will like it, as he is Irish all the way, so I'll send this to him and my daughter, Faith. Now I have to get going on something for the girlies. They have their father's Irish in them, and their mom's Korean....our little Irasian girls! Hmmm...better check out some more challenges!
Hope it brings you some luck!
Blessings,
lynda
Tuesday, February 22, 2011
Technique Tuesday - Coloring With Pastels
Pitt Pastels for soft coloring
Today's technique is coloring with Pitt Pastel pencils. These pencils are pastel chalks, made by Faber Castell. I like this brand because the chalk is soft and blends really well. I love the chalk in pencil form. It is easy to control, yet has many of the attributes of the chalk palettes you may be familiar with.
I made these two cards using Pitt Pastels to color the main images.
This first card features Penny Black stamps (30-014 clear set and 3949H poppies). The bottom panel is a piece I had previously created with alcohol ink. Spellbinder's dies were used to cut the image and the panel around it, and I used one of the Spellbinder's label dies (cut in half and attached to the panel) for the top and bottom pieces. The strip of mulberry paper was added for softness. I used the stardust gel pen to add some sparkle to the butterfly, around the image panel, and friends.
Challenges I've entered this poppy card in:
Allsorts Challenge Blog - Inspired by Nature
Penny Black At Allsorts Challenge - Say It With Flowers
Hero Arts stamps were used on this card. Spellbinder's dies were used for the panel and the scalloped layer piece. EK Success punch was used for the purple border. I stamped the left panel with the floral border from the clear set CL045. I also stamped the white satin ribbon with the same stamp. To create the ribbon flower, I stitched along one long edge of a five inch piece of stamped ribbon, then pulled the stitches up to gather, and stitched it together to form the flower shape, and added a pearl to the center. The right panel is H214 manuscript background. The hydrangea is one of my old favorites F2067 The silver friends is from a Class-A-Peels border by Stampendous.
Challenges I've entered this card in:

Allsorts Challenge Blog - Inspired by Nature
Hero Arts Club Monthly Contest- Friendship & Love
Start with three or four colors for each part of the image. For the poppy card, I chose three different reds, a rust for the centers, and two greens for leaves and stems.
Tortillions are used for blending. A tortillion is a blending stump, made from tightly wound heavy paper. I got mine at AC Moore. The pastels are available at most craft store art areas, or at art stores, usually as a set.
I like to "ink" my stamp with my markers, using the colors I want my images to be. In this case, I colored the stamp using red marker for the flowers, rust for the centers, and green for the stems. This way, when I color it in, there is not that harsh black outline as there is when you stamp your image in black. Just a different look, much softer.
Adding Color
Start coloring with your lightest color for each area. Then add the next shade, finishing with touches of the darkest color where it would naturally be darker.
Blending with tortillion
Using the tortillion, begin rubbing the colored image. This will blend the colors and soften the look. I use one tortillion for each color group. I add a ring of the color around the top of the tortillion, so that I will always use that tortillion for that color group, thereby not contaminating it with other colors when I use it again.
Add white for highlights
I like to finish by adding some white highlights. To do this, use an eraser to remove some of the red where you want the highlights. Then color in with the white, and blend with the tortillion.
A fine mist of hair spray will set the chalk.
Hope you'll try this. The pastels are a wonderful medium, and I think you will like the way they blend, and the effects they give.
On a personal note
We celebrated our granddaughter Kennedy's baptism Sunday in Buffalo. It was a glorious day, and a glorious celebration. Her big sister, Keeley, was excited, and Kennedy was so sweet, and in such a happy mood. If you would like to read about it and see pictures, you can visit my writing blog, A Little Perspective (Kennedy's baptism post) .
Enjoy your week.
Blessings,
lynda
Today's technique is coloring with Pitt Pastel pencils. These pencils are pastel chalks, made by Faber Castell. I like this brand because the chalk is soft and blends really well. I love the chalk in pencil form. It is easy to control, yet has many of the attributes of the chalk palettes you may be familiar with.
I made these two cards using Pitt Pastels to color the main images.
Challenges I've entered this poppy card in:
Allsorts Challenge Blog - Inspired by Nature
Penny Black At Allsorts Challenge - Say It With Flowers
Hero Arts stamps were used on this card. Spellbinder's dies were used for the panel and the scalloped layer piece. EK Success punch was used for the purple border. I stamped the left panel with the floral border from the clear set CL045. I also stamped the white satin ribbon with the same stamp. To create the ribbon flower, I stitched along one long edge of a five inch piece of stamped ribbon, then pulled the stitches up to gather, and stitched it together to form the flower shape, and added a pearl to the center. The right panel is H214 manuscript background. The hydrangea is one of my old favorites F2067 The silver friends is from a Class-A-Peels border by Stampendous.
Challenges I've entered this card in:
| Stamping on ribbon |
Allsorts Challenge Blog - Inspired by Nature
Hero Arts Club Monthly Contest- Friendship & Love
Here's how to color the images with the Pitt Pastels:
Tortillions are used for blending. A tortillion is a blending stump, made from tightly wound heavy paper. I got mine at AC Moore. The pastels are available at most craft store art areas, or at art stores, usually as a set.
Adding Color
Start coloring with your lightest color for each area. Then add the next shade, finishing with touches of the darkest color where it would naturally be darker.
Blending with tortillion
Using the tortillion, begin rubbing the colored image. This will blend the colors and soften the look. I use one tortillion for each color group. I add a ring of the color around the top of the tortillion, so that I will always use that tortillion for that color group, thereby not contaminating it with other colors when I use it again.
Add white for highlights
I like to finish by adding some white highlights. To do this, use an eraser to remove some of the red where you want the highlights. Then color in with the white, and blend with the tortillion.
A fine mist of hair spray will set the chalk.
Hope you'll try this. The pastels are a wonderful medium, and I think you will like the way they blend, and the effects they give.
On a personal note
We celebrated our granddaughter Kennedy's baptism Sunday in Buffalo. It was a glorious day, and a glorious celebration. Her big sister, Keeley, was excited, and Kennedy was so sweet, and in such a happy mood. If you would like to read about it and see pictures, you can visit my writing blog, A Little Perspective (Kennedy's baptism post) .
Enjoy your week.
Blessings,
lynda
Friday, February 18, 2011
Jennifer McGuire's Smooching Technique on Hero Arts Blog
Just a short post tonight, as I wanted to direct you to a really inspiring article and YouTube tutorial by Jennifer McGuire over on the Hero Arts blog http://heroarts.com/learning/technique.cfm?techID=194 , in case you missed it. Jennifer presents her smooching technique, and the look is just so pretty.
I remember doing this technique years ago, and it's good to see a refreshed version. Jennifer uses chalk inks, but it will work just as well with your dye inks, even pigment inks. Also, note the words at the bottom....she shows how to "cut up" your phrase stamps to get the look you want. Very clever, that girl.
Do hop over and check it out. You will be pulling out your stamps and playing this weekend, for sure!
Just finished a blog post over on my writing blog, A Little Perspective . Now, I'm off to my craft room to cut up some stamps. And, then to the couch to work on a blanket I'm finishing up (knitting) for my grand-baby, Kennedy Grace, whose Christening is this Sunday. I want to be sure it is ready for the big occasion. I'll be knitting into the wee hours, I think. It's that procrastination thing.
With that, I'll say good night, make some tea, and get my fingers limbered up.
Blessings,
lynda
I remember doing this technique years ago, and it's good to see a refreshed version. Jennifer uses chalk inks, but it will work just as well with your dye inks, even pigment inks. Also, note the words at the bottom....she shows how to "cut up" your phrase stamps to get the look you want. Very clever, that girl.
Do hop over and check it out. You will be pulling out your stamps and playing this weekend, for sure!
Just finished a blog post over on my writing blog, A Little Perspective . Now, I'm off to my craft room to cut up some stamps. And, then to the couch to work on a blanket I'm finishing up (knitting) for my grand-baby, Kennedy Grace, whose Christening is this Sunday. I want to be sure it is ready for the big occasion. I'll be knitting into the wee hours, I think. It's that procrastination thing.
With that, I'll say good night, make some tea, and get my fingers limbered up.
Blessings,
lynda
Wednesday, February 16, 2011
Coffee Cup Challenge Winner!!
Well, color me embarrassed! I forgot to post the winner of the paper cup challenge here on the blog. I did post it on the Paper Arts Cafe Flickr Group, and the Hero Arts group, but forgot to post it here. So, in case you missed it over at Flickr, the winner is Cindy C. (cimee). CONGRATULATIONS Cindy! I already got the addresses from those of you who entered, and, of course, from the winner, so I could send the stickers to the entrants, and the stamps to our winner.
Thank you to to Virginia L., Michelle, Sylvia, and Cindy for playing. It was fun, and although I didn't get a large response from this first challenge, I will do it again. This time I will pick a theme where the products are easier to find!! lol.
IF YOU'RE HERE LOOKING FOR THE TECHNIQUE TUESDAY FOR THIS WEEK, JUST SCROLL DOWN TO THE PREVIOUS POST.
Blessings,
lynda
Thank you to to Virginia L., Michelle, Sylvia, and Cindy for playing. It was fun, and although I didn't get a large response from this first challenge, I will do it again. This time I will pick a theme where the products are easier to find!! lol.
IF YOU'RE HERE LOOKING FOR THE TECHNIQUE TUESDAY FOR THIS WEEK, JUST SCROLL DOWN TO THE PREVIOUS POST.
Blessings,
lynda
Tuesday, February 15, 2011
Technique Tuesday - Simple Card with Marker Outline
I love the look of simple cards...their clean lines, uncomplicated design, and fresh look. But, for me, they are a challenge. I find it difficult to stop at the CAS (clean and simple) point. I want to add more; multiple layers, dimension, a touch of this, a snip of that, a sprinkling of anything. That's why, when I received a request for some ideas for some simpler cards, I thought this was the perfect opportunity to challenge myself.
For today's technique, I chose a non-coloring, clean and easy marker technique.
Begin with a white embossed image. Choose a brush marker, such as Tombow or Marvy LePlume, in a color slightly darker than the color of the card stock the image is on. Then, simply run the marker around the image, creating an outline. That's it....it's that simple! As much as I love watercoloring, or adding color with PrismaColor pencils or chalks, this technique really makes the image "pop," and I love the look.
And here's my card:
Stamps are Penny Black. I stamped the script on the pink card. The main image panel is layered onto a scalloped layer, and attached. Miss you panel added. I stamped the same background script onto the flower, and attached with a button. Just a touch of crystal glitter glue to finish off the scallops and verse panel. I chose pink, so I could enter this in the Penny Black Saturday Challenge here. The theme is Pretty In Pink.
It was very difficult for me not to keep going, but I forced myself to stop. I'm pleased with the look, and will try it again. Hmmmm, looking at this, I'm thinking a few pearls, perhaps some lace and ribbon..... Well, here I go again! I will not add anything, I will not add anything, I will NOT!
Enjoy your evening.
Blessings,
lynda
For today's technique, I chose a non-coloring, clean and easy marker technique.
Begin with a white embossed image. Choose a brush marker, such as Tombow or Marvy LePlume, in a color slightly darker than the color of the card stock the image is on. Then, simply run the marker around the image, creating an outline. That's it....it's that simple! As much as I love watercoloring, or adding color with PrismaColor pencils or chalks, this technique really makes the image "pop," and I love the look.
And here's my card:
Stamps are Penny Black. I stamped the script on the pink card. The main image panel is layered onto a scalloped layer, and attached. Miss you panel added. I stamped the same background script onto the flower, and attached with a button. Just a touch of crystal glitter glue to finish off the scallops and verse panel. I chose pink, so I could enter this in the Penny Black Saturday Challenge here. The theme is Pretty In Pink.
It was very difficult for me not to keep going, but I forced myself to stop. I'm pleased with the look, and will try it again. Hmmmm, looking at this, I'm thinking a few pearls, perhaps some lace and ribbon..... Well, here I go again! I will not add anything, I will not add anything, I will NOT!
Enjoy your evening.
Blessings,
lynda
Tuesday, February 8, 2011
Technique Tuesday - Crinkled Ribbon for Cards and Layouts
Crinkled, dyed ribbon is very popular now. The vintage, distressed look enhances your cards and scrapbook pages and paper crafted projects. This crinkled ribbon can be expensive to purchase, but is very inexpensive and easy to make yourself.
This video by Lindsay, The Frugal Crafter shows how to make your own hand-dyed crinkled ribbon from rayon seam binding and dye based reinkers. Check it out here http://www.youtube.com/watch?v=3f6WcFAs3VM&feature=related .
Lindsay used liquid watercolor, and many of the other tutorials I've seen use glimmer Mist sprays. I make my own. I use the little mini misters from Ranger and fill them 3/4 with plain water.

Then just add a few (7 to 9) drops of refill ink. If you want shimmer, add a little Perfect Pearls (about 1/8 tsp), and mix well. Then just follow the directions in the video, and you have gorgeous, rich, crinkled ribbon!
I purchased a 100 foot roll of white rayon seam binding for just $7.95 at Zipperstop (click to bring you to the site).
And here is a card I made with my dyed, crinkled ribbon.
I used Adirondack bottle and denim inks, with green interference Perfect Pearls. I do like to push the envelope a bit, and had to try stamping on the finished ribbon.
I used Penny Black's Letter Background 1999L for the script effect on the ribbon (it shows up better on the real ribbon than it does in the picture. The leaf is Penny Black's Leaf Spray 2026H. Not sure where the celebrate script is from - it was a cling that I forgot to label after removing it from the block.
To make the ribbon flower, simply gather about 5" of the ribbon along one long edge with needle and thread, pull up to gather, then sew into flower shape. I used a permanent marker to dye a pearl for the center (and the button on the bow).
Have a wonderful evening, and stop back tomorrow to see the winner of my blog candy coffee cup challenge!
Blessings,
lynda
This video by Lindsay, The Frugal Crafter shows how to make your own hand-dyed crinkled ribbon from rayon seam binding and dye based reinkers. Check it out here http://www.youtube.com/watch?v=3f6WcFAs3VM&feature=related .
Lindsay used liquid watercolor, and many of the other tutorials I've seen use glimmer Mist sprays. I make my own. I use the little mini misters from Ranger and fill them 3/4 with plain water.
Then just add a few (7 to 9) drops of refill ink. If you want shimmer, add a little Perfect Pearls (about 1/8 tsp), and mix well. Then just follow the directions in the video, and you have gorgeous, rich, crinkled ribbon!
I purchased a 100 foot roll of white rayon seam binding for just $7.95 at Zipperstop (click to bring you to the site).
And here is a card I made with my dyed, crinkled ribbon.
I used Adirondack bottle and denim inks, with green interference Perfect Pearls. I do like to push the envelope a bit, and had to try stamping on the finished ribbon.
I used Penny Black's Letter Background 1999L for the script effect on the ribbon (it shows up better on the real ribbon than it does in the picture. The leaf is Penny Black's Leaf Spray 2026H. Not sure where the celebrate script is from - it was a cling that I forgot to label after removing it from the block.
To make the ribbon flower, simply gather about 5" of the ribbon along one long edge with needle and thread, pull up to gather, then sew into flower shape. I used a permanent marker to dye a pearl for the center (and the button on the bow).
Have a wonderful evening, and stop back tomorrow to see the winner of my blog candy coffee cup challenge!
Blessings,
lynda
Subscribe to:
Posts (Atom)