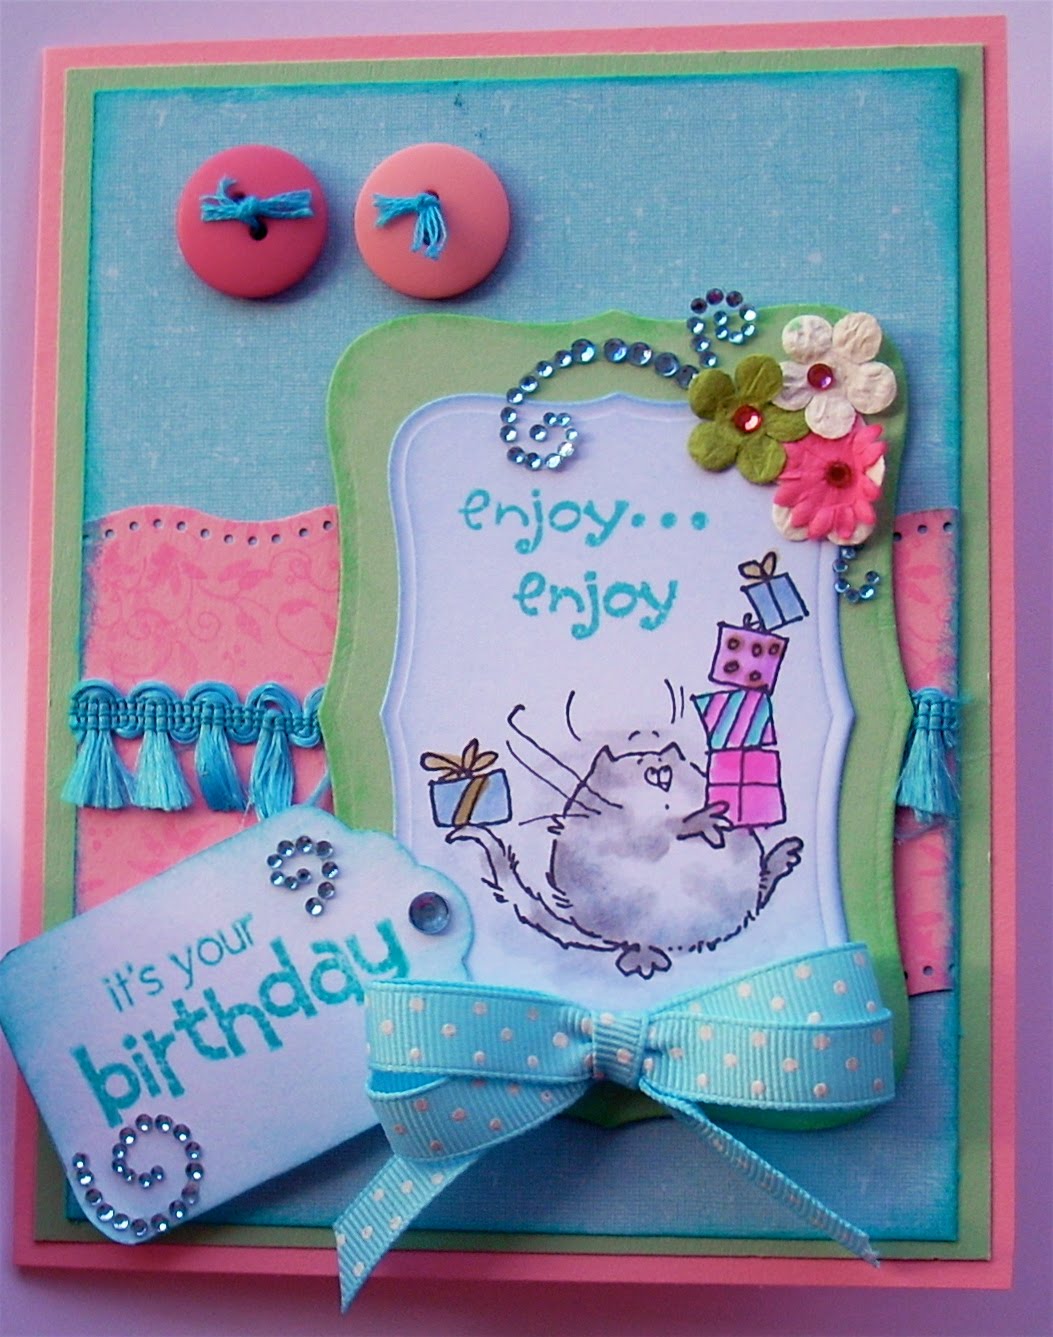
Yes, I had a busy day. Worked until noon, then went to lunch with a friend, and back to her house for some card-making and fun. The previous post is the first card, and this is the second card that I made for the Penny Black Saturday Challenge - http://pennybfriendssaturdaychallenge.blogspot.com/ . The theme for this challenge was In The Garden, and I chose this darling little sleeping hedgehog, cuz' I just adore him. I bought this paper because it made me smile - it's a "happy" paper, don't you think? Anyways, I just had to use it today!! It's by We R Memory Keepers.
It also fits the sketch challenge for the Unscripted Sketches #57 challenge - http://unscriptedsketches.com/ , and, Raise The Bar Challenge # 21 - http://raisethebarchallenge.blogspot.com/ , which is Celebrate Summer!
Here's my card:
It's called a Joy Fold Card, and it's ssooooo fun to make. I'll post a couple of pics so you can see the clever opening. The top panel opens UP, the the bottom panel opens DOWN. Then there's some cute stuff going on INSIDE the card, too. The little round flower embelly on the front is raised on foam, so that the front panel just tucks under it to keep it closed. Clever, huh. I learned this card over on Splitcoaststampers, and will be posting another, along with full directions, on Tuesday for my Technique Tuesday blog. Stop back soon!
Here are a couple of side/inside views:
That's it for today. I'm pooped, and ready for bed!! Take some time, tonight, to count your blessings!
lynda
Get comfy, pour your favorite beverage, and prepare to indulge your creative side with me. My philosophy is simple: Follow your heart, and inspiration will find you. Be yourself.
Friday, June 4, 2010
Thinking of You Card
Here's a card I made for a couple of challenges today. Stamps are by Penny Black, paper is Anna Griffin. The challenges were:
Penny Black Saturday Challenge - http://pennybfriendssaturdaychallenge.blogspot.com/ -
Theme: In the garden
Unscripted Sketches - http://unscriptedsketches.com/ -
Penny Black Saturday Challenge - http://pennybfriendssaturdaychallenge.blogspot.com/ -
Theme: In the garden
Unscripted Sketches - http://unscriptedsketches.com/ -
I stamped the scrolls on the background paper, and added the black strip and green ribbon, and buttons. I inked the stamp (Constellations # 3867K) with green and distress linen ink, spritzed, and stamped. Added stitching lines with black fine point marker. Stamped and cut out PB butterflies, from the Salutations set # 30-014.
Hope you get some time to create this weekend. Enjoy!
lynda
Tuesday, June 1, 2010
Technique Tuesday - Color Layering
The Hero Arts Blog featured a really gorgeous inking technique today, and I'm borrowing it for this week's Technique Tuesday. Shari Carroll is the artist who created this card, and she shows the technique she used on the post, as well as in a video. I really love the way this looks. You may have done variations of this, as I have taught similar techniques in the past, but this is just a little different. Here's the link to the technique video, which illustrates very precisely how to achieve this look. http://heroarts.com/learning/technique.cfm?techID=159 . And here's the card featured on the blog (another card is featured in the video).
Here's the link to the full article on the Hero Arts blog, which gives details about their current challenge, and info about the new images available now: http://heroarts.com/blogs/club/2010/06/01/take-two-tuesday-with-sketches-and-more/ . Hope you'll hop on over to check it out.
I had to try it, and here's the card I made with this technique. I used a sketch from the Card Patterns blog challenge here- http://cardpatterns.blogspot.com/2010/05/sketch-66.html - for this card:
Here's the sketch from the Card Patterns challenge:
Hope you'll stop by the Card Patterns blog and try their sketch challenge. It's fun, and a great way to get some card ideas. Soon I will post an article on how to use card and scrapbook patterns. For now, just hop on over and give it a try. You will soon be addicted!
I also used a button and flowers on it so I could enter it in the Secret Crafter Saturday Challenge over here: http://thesecretcraftersaturdaychallenge.blogspot.com/, which was Buttons and Blooms somewhere on your creations. Check out their blog, also. There are some really gorgeous design team samples, and if you click on the photos, it will take you to the person's blog, where you can see how each card was made!
Oh, and getting back to the Hero Arts Color Layering technique, if you are like me, you probably cringed when the instructions said to stamp the darker inked image into the lighter ink pad. Horrors....get my light green contaminated with a much darker green ink?! You can probably feel me wincing even now. Soooo, being the ever so resourceful one, I looked around my craft room for an idea to help me do this without getting my stamp pads contaminated. Eureka!!! Right under my nose, literally, was my craft pad. I keep it right on my work table, and do all my stamping and creating on it. It's where I rub markers to mix with water for watercolor, stick my foam tape to, mix my colors, etc. So, I simply took the lighter color stamp pad, dabbed it onto the pad until I had a nice heavy application of color, and used it as my "ink pad" for the second part of the directions, where you ink the image with the lighter color without removing the darker color. I got the same results, without soiling my ink pad!
Well, that's it for today. Glee is about to start. Hope you're having a wonderful week.
Blessings and peace,
lynda
Here's the link to the full article on the Hero Arts blog, which gives details about their current challenge, and info about the new images available now: http://heroarts.com/blogs/club/2010/06/01/take-two-tuesday-with-sketches-and-more/ . Hope you'll hop on over to check it out.
I had to try it, and here's the card I made with this technique. I used a sketch from the Card Patterns blog challenge here- http://cardpatterns.blogspot.com/2010/05/sketch-66.html - for this card:
Here's the sketch from the Card Patterns challenge:
Hope you'll stop by the Card Patterns blog and try their sketch challenge. It's fun, and a great way to get some card ideas. Soon I will post an article on how to use card and scrapbook patterns. For now, just hop on over and give it a try. You will soon be addicted!
I also used a button and flowers on it so I could enter it in the Secret Crafter Saturday Challenge over here: http://thesecretcraftersaturdaychallenge.blogspot.com/, which was Buttons and Blooms somewhere on your creations. Check out their blog, also. There are some really gorgeous design team samples, and if you click on the photos, it will take you to the person's blog, where you can see how each card was made!
Oh, and getting back to the Hero Arts Color Layering technique, if you are like me, you probably cringed when the instructions said to stamp the darker inked image into the lighter ink pad. Horrors....get my light green contaminated with a much darker green ink?! You can probably feel me wincing even now. Soooo, being the ever so resourceful one, I looked around my craft room for an idea to help me do this without getting my stamp pads contaminated. Eureka!!! Right under my nose, literally, was my craft pad. I keep it right on my work table, and do all my stamping and creating on it. It's where I rub markers to mix with water for watercolor, stick my foam tape to, mix my colors, etc. So, I simply took the lighter color stamp pad, dabbed it onto the pad until I had a nice heavy application of color, and used it as my "ink pad" for the second part of the directions, where you ink the image with the lighter color without removing the darker color. I got the same results, without soiling my ink pad!
Well, that's it for today. Glee is about to start. Hope you're having a wonderful week.
Blessings and peace,
lynda
Thursday, May 27, 2010
Challenge Card
Just finished this card for some challenges.
The Our Daily Bread challenge http://ourdailybreaddesignsblog.blogspot.com/ was to use a verse as the focal point.
The Colour Create challenge http://colourcreatechallenge.blogspot.com/ was to use light lime green and aqua, with the optional extra of butterflies.
The Card Patterns Blog challenge http://www.cardpatterns.blogspot.com/ was a sketch.
Here's my card:
The verse is from the ODBD Scripture Collection 1. It's one of my favorite verses. I layered my papers, used an EK Success punch for the aqua border piece. Triple bow, Hero Arts flowers, and Recollections crystals. I inked the verse with aqua ink, then used my black Marvy marker over the darker highlighted parts of the verse for emphasis. Butterflies are punched from cardstock and vellum and highlighted with glitter glue.
I really enjoyed this challenge. Hope you'll take some time to check out the Our Daily Bread Designs blog and Colour Create blog (links above). I was a winner of the last ODBD challenge, which was to use flowers. It was a great honor for me.
I hope you have a wonderful, joyful Memorial Day weekend, and get to be with those you love.
Blessings and peace,
lynda
The Our Daily Bread challenge http://ourdailybreaddesignsblog.blogspot.com/ was to use a verse as the focal point.
The Colour Create challenge http://colourcreatechallenge.blogspot.com/ was to use light lime green and aqua, with the optional extra of butterflies.
The Card Patterns Blog challenge http://www.cardpatterns.blogspot.com/ was a sketch.
Here's my card:
The verse is from the ODBD Scripture Collection 1. It's one of my favorite verses. I layered my papers, used an EK Success punch for the aqua border piece. Triple bow, Hero Arts flowers, and Recollections crystals. I inked the verse with aqua ink, then used my black Marvy marker over the darker highlighted parts of the verse for emphasis. Butterflies are punched from cardstock and vellum and highlighted with glitter glue.
I really enjoyed this challenge. Hope you'll take some time to check out the Our Daily Bread Designs blog and Colour Create blog (links above). I was a winner of the last ODBD challenge, which was to use flowers. It was a great honor for me.
I hope you have a wonderful, joyful Memorial Day weekend, and get to be with those you love.
Blessings and peace,
lynda
Tuesday, May 25, 2010
Technique Tuesday - Faux Layering for cards and scrapbook pages
Sometimes I want layers on my card, or page, but need to keep actual layers to a minimum, or I already know that I'm going to use lots of layering with elements, so want to keep my paper layers to a minimum. Or sometimes I just can't find the right print or background paper for the cardstock I'm using (hard to believe if you ever saw the stash of paper I have in my room). But, it does happen.
I have made my own background papers using lots of different techniques, usually make the paper, then cut and layer it onto my card. I found this really fun technique on Stamp With Tami's blog http://stampwithtami.com/ where she made a "faux layer" directly on the cardstock. I tried it, and am really hooked. Link to Tami's video tutorial is below.
Here's the card I made using Tami's technique:
The top part of the card, where it looks like torn floral paper, is actually the technique part. I did it directly on the cardstock! Doesn't it look like a torn layer added to the card?
To create this look, simply tear a piece of scrap paper, put it on your card where you want your faux layer to be, and using a sponge applicator, apply ink along the torn edge of the scrap paper. As you apply ink, drag some of it up onto the rest of the card, but lightly. Then, keeping the torn scrap paper mask in place, stamp some images on the exposed paper, making sure to have some go off the edges. When you remove the torn paper mask, Voila! You have what looks like a torn layer on your card! Here's Tami's YouTube video, which illustrates this technique step by step. She did a fantastic job with this tutorial. http://www.youtube.com/watch?v=JQF9QDnYsDw&feature=player_embedded#! .
I love this technique! Hope you will give it a try...it's so much fun to do. You know me, I love to play with my inks, so this is right up my alley! The rest of the card: I used Hero Arts stamps (G2120) Natural Bamboo, and C2703 With Caring thoughts. I inked the bamboo with greens and brown ink, then used a damp paint brush to pull the color off the stamped image, to give it that smudged watercolor look. I stamped the verse on a scrap piece of cardstock, cut it apart, mounted it onto the brown, then foam taped it onto the card. I colored the pearls brown (upper left and flower center) with my Peel Off markers.
That's it. Easy card, and quick! And I am always hearing the need for ideas for men's cards. This is a great card idea for a man, just use a different verse!
Enjoy the rest of your week. I think we've already entered summer! Going to be nice all week.
Blessings and peace,
lynda
I have made my own background papers using lots of different techniques, usually make the paper, then cut and layer it onto my card. I found this really fun technique on Stamp With Tami's blog http://stampwithtami.com/ where she made a "faux layer" directly on the cardstock. I tried it, and am really hooked. Link to Tami's video tutorial is below.
Here's the card I made using Tami's technique:
The top part of the card, where it looks like torn floral paper, is actually the technique part. I did it directly on the cardstock! Doesn't it look like a torn layer added to the card?
To create this look, simply tear a piece of scrap paper, put it on your card where you want your faux layer to be, and using a sponge applicator, apply ink along the torn edge of the scrap paper. As you apply ink, drag some of it up onto the rest of the card, but lightly. Then, keeping the torn scrap paper mask in place, stamp some images on the exposed paper, making sure to have some go off the edges. When you remove the torn paper mask, Voila! You have what looks like a torn layer on your card! Here's Tami's YouTube video, which illustrates this technique step by step. She did a fantastic job with this tutorial. http://www.youtube.com/watch?v=JQF9QDnYsDw&feature=player_embedded#! .
I love this technique! Hope you will give it a try...it's so much fun to do. You know me, I love to play with my inks, so this is right up my alley! The rest of the card: I used Hero Arts stamps (G2120) Natural Bamboo, and C2703 With Caring thoughts. I inked the bamboo with greens and brown ink, then used a damp paint brush to pull the color off the stamped image, to give it that smudged watercolor look. I stamped the verse on a scrap piece of cardstock, cut it apart, mounted it onto the brown, then foam taped it onto the card. I colored the pearls brown (upper left and flower center) with my Peel Off markers.
That's it. Easy card, and quick! And I am always hearing the need for ideas for men's cards. This is a great card idea for a man, just use a different verse!
Enjoy the rest of your week. I think we've already entered summer! Going to be nice all week.
Blessings and peace,
lynda
Thursday, May 20, 2010
I Got Some New Rubber Stamps!
I love the new stamps I bought on line at Our Daily Bread Designs. I got a set of scripture stamps, a lovely lilies of the valley stamps set, which I used on the card I am featuring today. I made it for three challenges. One is for the Our Daily Bread Designs challenge, in which you had to use flowers. Here's a link to the blog and challenge: http://ourdailybreaddesignsblog.blogspot.com/search/label/Latest%20%20Challenge . The other challenge is a sketch challenge by The Pink Elephant here: http://thepinkelephantchallenge.blogspot.com/ . And, finally, the Basic Grey challenge, which was to use punches: http://basicgreychallenges.blogspot.com/2010/05/week-20-punch-it.html .
And here's my card:
We're finally having some really nice spring weather, and I couldn't help just sitting out on the porch for a while after work today. Everything seemed so fresh and new, and it was so good seeing neighbors busy in their gardens and yards. Which is where I should be. Well, my granddaughter, Keeley, will help me in my garden tomorrow and over the weekend, because she's spending the weekend with Nana and Papa, and we are thrilled. The blog will be quiet this weekend, but Keeley and I will be stamping, you can be sure of that!
Blessings and peace,
lynda
And here's my card:
We're finally having some really nice spring weather, and I couldn't help just sitting out on the porch for a while after work today. Everything seemed so fresh and new, and it was so good seeing neighbors busy in their gardens and yards. Which is where I should be. Well, my granddaughter, Keeley, will help me in my garden tomorrow and over the weekend, because she's spending the weekend with Nana and Papa, and we are thrilled. The blog will be quiet this weekend, but Keeley and I will be stamping, you can be sure of that!
Blessings and peace,
lynda
Wednesday, May 19, 2010
Another Challenge Card
Here's another card I made this evening for the Colour Create Challenge/Design Team Call http://colourcreatechallenge.blogspot.com/2010/05/colour-create-44-dt-call.html . The challenge was to use khaki, aqua, brown, and cream on a card. Here's my card:
Thanks for all your wonderful kudos and comments on yesterday's card.
Blessings and peace,
lynda
Thanks for all your wonderful kudos and comments on yesterday's card.
Blessings and peace,
lynda
Friends Are Treasures Challenge Card
If you are looking for the Technique Tuesday blog post, please scroll down one to the previous entry. I just finished this card for a couple of challenges, and needed to get it up before going to work tomorrow. I made this card for the Colour Create Challenge and Design Team call, here http://colourcreatechallenge.blogspot.com/2010/05/colour-create-44-dt-call.html , in which we had to use khaki, aqua, brown and cream; and the Penny Black Saturday challenge, here http://pennybfriendssaturdaychallenge.blogspot.com/2010/05/penny-black-saturday-week-101.html , which was to use flowers and Penny Black stamps.
Enjoy!
Blessings and peace,
lynda
Tuesday, May 18, 2010
Technique Tuesday - Pleated Medallions
I saw this technique on the Hero Arts Club Blog yesterday, and really liked it, so I used it on this Father's Day card. Instructions on how to make the medallion are here http://heroarts.com/blogs/club/2010/05/17/marvelous-medallions/ . Once you are on the site, there is a link you can go to which shows how to make the card they made. These medallions are soooo much fun to make and are really, really easy. I used my score board to do the 1/4" scores, and it was easy-peasy! I used my hot glue gun to secure the medallion and hold it in position. I'm making medallions out of everything now, nothing is safe. I can't help it, they're so FUN to make! Here's my card:
For my card, I started with the kraft colored card. I found some texture makers in Joanne's the other day, and thought they looked interesting, so I bought a package and brought them home to experiment. They are called Studio (by Sculpey) Texture Makers. They're made for clay, actually. They come two to a package. This one is from the Country Squares package. They are a flexible, soft plastic. I simply inked it with my VersaMark pad, and pressed it onto the kraft card (I used a brayer to get it on there good and even). That's the basket weave design you see on the background. I did use them with my Cuttlebug, but more on that in another post.
I added the brown and patterned paper layers, the green strip with the stamped verse, the brads, and finally the medallions with the stamped circles. Of course, I distressed all the pieces, because I can't seem to stop distressing everything!
This month's theme on the Hero blog is birthdays, Father's Day, and graduation. I am submitting this card for the Father's Day part.
That's it for today. Be sure to make some time for yourself, to create, to play, to enjoy nature, and to get refreshed.
Blessings and peace,
lynda
For my card, I started with the kraft colored card. I found some texture makers in Joanne's the other day, and thought they looked interesting, so I bought a package and brought them home to experiment. They are called Studio (by Sculpey) Texture Makers. They're made for clay, actually. They come two to a package. This one is from the Country Squares package. They are a flexible, soft plastic. I simply inked it with my VersaMark pad, and pressed it onto the kraft card (I used a brayer to get it on there good and even). That's the basket weave design you see on the background. I did use them with my Cuttlebug, but more on that in another post.
I added the brown and patterned paper layers, the green strip with the stamped verse, the brads, and finally the medallions with the stamped circles. Of course, I distressed all the pieces, because I can't seem to stop distressing everything!
This month's theme on the Hero blog is birthdays, Father's Day, and graduation. I am submitting this card for the Father's Day part.
That's it for today. Be sure to make some time for yourself, to create, to play, to enjoy nature, and to get refreshed.
Blessings and peace,
lynda
Tuesday, May 11, 2010
Technique Tuesday - White Gel Pen Highlights
Sometimes a touch of white is all a card needs to really give it that finishing touch. After I made this card, I knew it needed something. I took out my white gel pen, and began tracing the flowers on the blue panel, then drawing some dots and circles, following the black paisley design. It really made this background "pop," and enhanced the look of the card.
I finished it off with some crystals, flowers, and, of course, glitter.
I use the Sakura gelly roll white pen. It doesn't skip as much as some others I have tried. The trick is to write, or draw slowly, and the pen should keep up with you. If you go too fast, it will skip. I store my pens in a cup with the point down, and in drawers flat.
Hope you're having a good week so far. I had a great day today, scrapping with my friend Sylvia. We started out at my Prayer Shawl Group at my church, then went right to my house to scrap. We got lots of pages done in a scrapbook she is making for her daughter's upcoming wedding! We really had a good time, and feel good about all we got accomplished. It was a lovely day off. Back to work tomorrow!
Blessings and peace to you.
lynda
I finished it off with some crystals, flowers, and, of course, glitter.
I use the Sakura gelly roll white pen. It doesn't skip as much as some others I have tried. The trick is to write, or draw slowly, and the pen should keep up with you. If you go too fast, it will skip. I store my pens in a cup with the point down, and in drawers flat.
Hope you're having a good week so far. I had a great day today, scrapping with my friend Sylvia. We started out at my Prayer Shawl Group at my church, then went right to my house to scrap. We got lots of pages done in a scrapbook she is making for her daughter's upcoming wedding! We really had a good time, and feel good about all we got accomplished. It was a lovely day off. Back to work tomorrow!
Blessings and peace to you.
lynda
Saturday, May 8, 2010
Floral Card
Had a pretty productive day yesterday afternoon with my friend, Karen, stamping and playing at her house after work. I made a couple of cards, got some organizing done, and we solved the world's problems. Well, maybe not the world's problems, but we did have lots of fun.
I fell in love with an Inkadinkado clear stamp set of Karen's, and had to use it to make a card. Here it is:
I used the black India Ink pad to stamp the images, and used my Dove Blender with stamp pad ink to paint the images. Spellbinder's nestabilities dies, and an EK Success punch. I sponged the white panels to soften the white a bit, added some Stardust glitter gel pen, and crystals for some understated bling. Finished off with a double bow.
I think I have to go buy this stamp set....I really, really like it.
Hope you're keeping safe from the wind today, and having a good weekend.
Happy Mother's Day to all the moms and soon-to-be moms tomorrow!
Blessings and peace,
lynda
I fell in love with an Inkadinkado clear stamp set of Karen's, and had to use it to make a card. Here it is:
I used the black India Ink pad to stamp the images, and used my Dove Blender with stamp pad ink to paint the images. Spellbinder's nestabilities dies, and an EK Success punch. I sponged the white panels to soften the white a bit, added some Stardust glitter gel pen, and crystals for some understated bling. Finished off with a double bow.
I think I have to go buy this stamp set....I really, really like it.
Hope you're keeping safe from the wind today, and having a good weekend.
Happy Mother's Day to all the moms and soon-to-be moms tomorrow!
Blessings and peace,
lynda
Thursday, May 6, 2010
The making of a thank you card
I really had fun making this card.
I started with some Hero Arts grass textured paper for the card itself. I cut two panels with the Labels Eight Spellbinder's Nestabilities dies, one from natural textured cardstock, and one from natural plain cardstock. I set aside the larger die (textured), and stamped the Hero Arts Graceful Leaves F4321 stamp in green a couple of times onto the smaller plain natural panel. Then I embossed it, as well, with gold embossing powder. This to finish the panel, I stippled light, then dark green ink along the edges and well into the panel, leaving it lighter towards the center. Finally, I stamped Thank You (Hero Arts D337). I lined the edge with my gold leaf pen, then added three brads along the left side. I attached the stamped panel to the larger panel with foam tape, wrapped some gold cording around them three times and tied in a knot, and set aside.
I punched the edge of a scrap of gold paper with a Martha Stewart border punch, and layered it near the bottom of the green card.
I attached the prepared panel with foam tape over the card and border.
I made a scrunchy flower (see several week's ago Technique Tuesday post for directions). I used pages from an old book, my blossoms Spellbinder's Nestabilities dies, stippled green ink, then sponged gold Lumiere paint on the edges. I added a touch of gold ribbon and made a bow with the gold cording and adhered them under the flower on the right bottom of card. I added a silk blossom, and was finished.
I'm really having fun with making my own flowers lately.
Tomorrow is Friday, and I only have half day of work, then I'm off to Karen's house to play. I love to get together with other stampers/scrappers. It's so fun to share techniques and ideas, and bounce ideas off each other. Soooo, TGIF! Gotta go figure out what I want to drag along with me for my outing tomorrow!
Goodnight, and sweet blessings to you!
lynda
Tuesday, May 4, 2010
Technique Tuesday - Scored Background
I love my Martha Stewart scoring board!!! It has a compartment to store the bone folder so it is always with the board, and also comes with a handy envelope guide and project booklet. This booklet shows how to use the board to make an A-2 envelope, and tells how to adjust for other sizes, and also how to make a small gift box, A-2 card, of course, and A2 gate fold card. AND, it's less than half the price of the other scoring boards I've seen on the market. Another great feature, which I appreciate very much, is that the score lines are 1/8 inch apart, rather than 1/4 inch. OK, 'nuff said. Now, on to the project I did with my MS score board.
By the way, I created this card for some challenges. Cards Blog challenge was to create a Mother's Day card http://northridgemedia.net/blogs/cards/uncategorized/challenge-gallery-and-new-challenge-29/ . I used the Paper Crafts Sketch challenge sketch http://www.papercraftsconnection.com/blog/tag/go-to-sketch-challenge-2/ , and Raise The Bar challenge was to make a mother's day card http://raisethebarchallenge.blogspot.com/ and finally, the Our Creative Corner (OCC) challenge to make a Mother's Day card with no flowers.
If you click on the image, you will get a closer look at the background (kraft colored) panel. Notice the criss/cross pattern. This is the technique I'm going to show you today.
* I cut my kraft panel to the desired size, then I placed it at an angle on my score board. I used the rulers along both edges to get the desired angle to be perpendicular to the sides of the card.
*Then I simply used the bone folder to score lines every half inch.
*Then I turned the card, lined it up, and made half inch scores in the opposite direction.
*The final step was sanding. I used a sanding block to lightly sand the raised edges, or criss-crosses. This took some of the color off, and made them show up more. Another option would be to use a sponge and some ink and lightly drag it along the surface, highlighting the raised areas with ink.
I used Hero Arts stamps, and Spellbinder's dies. The hearts on the bottom right are punched, then run through my Cuttlebug with the swirl folder. I distressed the panel and the hearts with brown ink. I dyed the lace pink with some ink and a waterbrush.
I think I'll make a couple more of this one, without the MOM punched letters. It would make a great birthday card for a special friend, or daughter, or mom! I am really loving this clear set with the high heels....been having a lot of fun with it.
Well, that's it for now. I got home early from work today, and decided to get this post up. It's so nice outside, I think I'll sit on the deck and read for a while. I'm about half way through The Lovely Bones, and am anxious to finish it.
Blessings and peace to you!
lynda
By the way, I created this card for some challenges. Cards Blog challenge was to create a Mother's Day card http://northridgemedia.net/blogs/cards/uncategorized/challenge-gallery-and-new-challenge-29/ . I used the Paper Crafts Sketch challenge sketch http://www.papercraftsconnection.com/blog/tag/go-to-sketch-challenge-2/ , and Raise The Bar challenge was to make a mother's day card http://raisethebarchallenge.blogspot.com/ and finally, the Our Creative Corner (OCC) challenge to make a Mother's Day card with no flowers.
If you click on the image, you will get a closer look at the background (kraft colored) panel. Notice the criss/cross pattern. This is the technique I'm going to show you today.
* I cut my kraft panel to the desired size, then I placed it at an angle on my score board. I used the rulers along both edges to get the desired angle to be perpendicular to the sides of the card.
*Then I simply used the bone folder to score lines every half inch.
*Then I turned the card, lined it up, and made half inch scores in the opposite direction.
*The final step was sanding. I used a sanding block to lightly sand the raised edges, or criss-crosses. This took some of the color off, and made them show up more. Another option would be to use a sponge and some ink and lightly drag it along the surface, highlighting the raised areas with ink.
I used Hero Arts stamps, and Spellbinder's dies. The hearts on the bottom right are punched, then run through my Cuttlebug with the swirl folder. I distressed the panel and the hearts with brown ink. I dyed the lace pink with some ink and a waterbrush.
I think I'll make a couple more of this one, without the MOM punched letters. It would make a great birthday card for a special friend, or daughter, or mom! I am really loving this clear set with the high heels....been having a lot of fun with it.
Well, that's it for now. I got home early from work today, and decided to get this post up. It's so nice outside, I think I'll sit on the deck and read for a while. I'm about half way through The Lovely Bones, and am anxious to finish it.
Blessings and peace to you!
lynda
Thursday, April 29, 2010
Birthday Card - Penny Black Saturday Challenge
I made this card for the Penny Black Saturday Challenge http://pennybfriendssaturdaychallenge.blogspot.com/ this week, and also entered it in the Simon Says Stamp challenge http://simonsaysstampschallenge.blogspot.com/. The requirements for Penny Black were to use three flowers, two buttons, and a bow. Simon Says challenge was buttons, bows, and bling! Not a problem for me, cuz I love my flowers, and bows, and buttons, too! I thought I had finished it, but something was missing, so I went back and added some bling. Can't help myself, I love my bling!! So, here it is the card:
Hope you're having a good week. Tomorrow's FRIDAY!!!! Yay. TGIF. Keeley's coming tomorrow for the weekend, so we're getting ready. Got some snacks, her favorite foods for meals, some fun things to do, and my camera's all ready. It's supposed to be nice, so we'll be outside a lot, I hope.
Hope you have some fun plans, and get to enjoy the outdoors this weekend.
Blessings and peace,
lynda
Hope you're having a good week. Tomorrow's FRIDAY!!!! Yay. TGIF. Keeley's coming tomorrow for the weekend, so we're getting ready. Got some snacks, her favorite foods for meals, some fun things to do, and my camera's all ready. It's supposed to be nice, so we'll be outside a lot, I hope.
Hope you have some fun plans, and get to enjoy the outdoors this weekend.
Blessings and peace,
lynda
Tuesday, April 27, 2010
Technique Tuesday - Fold-Over Card
Sometimes I get tired of the same old card style, and like to shake things up a bit.....try different openings, folds, etc. Today I'd like to share a card with a simple fold-over front.
Stamps are Penny Black, punch is Martha Stewart. To make the card, simply fold back the front of an A2 size card. I made the image hang over the edge slightly, adding interest.
That's it!! Simple, clean, and pretty.
Hope you're having a great week. Looks like some nice weather coming this weekend!!!!! Get out and enjoy!
Blessings and peace,
lynda
Stamps are Penny Black, punch is Martha Stewart. To make the card, simply fold back the front of an A2 size card. I made the image hang over the edge slightly, adding interest.
That's it!! Simple, clean, and pretty.
Hope you're having a great week. Looks like some nice weather coming this weekend!!!!! Get out and enjoy!
Blessings and peace,
lynda
Monday, April 26, 2010
Blue, White, and Gold Blossom Card
I made this card for the Basic Grey color challenge this week. Blue, Gold, and White were the colors, and definitely a challenge for me, as these are not my usual "go to" colors, but thought I'd give it a try. As I was making the card, I thought of a couple of other challenges I could tie it in with, and so have also entered it in Card Patterns Sketch 61 challenge, and Our Creative Corner's "blossoms" challenge. Sorry, my Blogger is giving me some problems adding links today, so I will try to come back and add the links later or tomorrow. I also cannot access my comments, so please be patient, and hopefully blogger will iron out these snags and I can publish your comments and get these links up for you.
So, here's the scoop on the card. I used Basic Grey paper for the background, and have to admit, I do love this shade and the lovely swirl design on the paper. I created the gold edge with a gold leaf pen. I chose a dark blue card stock to highlight it, and had a half sheet of this wonderful gold paper in my stash. I used my Spellbinder's Nestabilities Blossom die for the flower blossom. I cut three sizes, two from gold, one from white. Next, I distressed the bejebers out of the edges of the petals by folding and rolling the edges, even tearing them a little. I love the way the white back on the gold paper highlights the edges. I stacked these petals together with foam tape between to creat the blossom. I used my gold leaf pen to paint a button gold, and tied gold metallic floss through it. With the blue cardstock, I freehand tore petals, and repeated the rolling technique. I stamped Printworks' happy birthday and celebrate stamps with Brilliance gold ink on the petals, them foam taped them from the blossom. On the border strip of blue, I used the Cuttlebug embossing folder to create this elegant swirl, then swiped my Brilliance gold ink pad over the raised image to highlight. Then I finished off the card with some gold brads, and a matching blue bow.
Hope you enjoy, and do come back to check out these links. I encourage you to enter some challenges. It's fun, and really stretches your creativity.
Blessings and peace,
lynda
So, here's the scoop on the card. I used Basic Grey paper for the background, and have to admit, I do love this shade and the lovely swirl design on the paper. I created the gold edge with a gold leaf pen. I chose a dark blue card stock to highlight it, and had a half sheet of this wonderful gold paper in my stash. I used my Spellbinder's Nestabilities Blossom die for the flower blossom. I cut three sizes, two from gold, one from white. Next, I distressed the bejebers out of the edges of the petals by folding and rolling the edges, even tearing them a little. I love the way the white back on the gold paper highlights the edges. I stacked these petals together with foam tape between to creat the blossom. I used my gold leaf pen to paint a button gold, and tied gold metallic floss through it. With the blue cardstock, I freehand tore petals, and repeated the rolling technique. I stamped Printworks' happy birthday and celebrate stamps with Brilliance gold ink on the petals, them foam taped them from the blossom. On the border strip of blue, I used the Cuttlebug embossing folder to create this elegant swirl, then swiped my Brilliance gold ink pad over the raised image to highlight. Then I finished off the card with some gold brads, and a matching blue bow.
Hope you enjoy, and do come back to check out these links. I encourage you to enter some challenges. It's fun, and really stretches your creativity.
Blessings and peace,
lynda
Wednesday, April 21, 2010
Crystals and rhinestones - Cards and pages with bling!
I have a "stash" box (or two or three) of stamped pieces, background pieces, technique sample pieces, well, you get the idea. These are things I made lots of, as in the case of backgrounds and/or technique samples, perhaps for a demo or class, or just because I like playing and can't stop when I'm having fun with an idea or technique. Some of the items in the boxes are stamped things, like images of something I like, or a stamp I used when stamping with a friend and borrowed her stamp to make a bunch of images to "use later." Sometimes, when I'm stamping something, I'll often stamp two, and stash the extra in the box. Or, I'll stamp something, then get another idea and decide to can the image, in, which case, it goes in the box. So, needless to say, these boxes get quite full after a while.
Last Friday I got together with a friend to stamp and/or scrapbook. I was having one of those days where my mojo was gone, MIA, non-existent!!!! No mojo to be found....anywhere. Karen was happily scrapping away, pumping out page after page, and there I sat, fidgeting, starting and stopping, tearing up stuff I started, thumbing through magazines, just basically wasting time. I couldn't get an idea to save my life!!!! YES, IT DOES, DOES, DOES happen to me!!!!
Then I decided to check out one of my boxes. I figured I might as well just pull out an image or two and at least color it. I could still color, even if I couldn't make a creative move due to my mojo-lessness!
Out of the box came this adorable little girl. I had six of them stamped on a sheet of white cardstock. I cut one out, and proceeded to color it with my Prismacolors (colored pencils). As I colored, a funny thing happened. I really got into it, and started thinking of ways I could use this little girl on a card. I chose bright colors, and went to town. All the while, the wheels were turning. Turns out, all I needed to do was to start doing something, then the ideas started to come. After I got her colored, I cut her out, then started picking out colors for papers for a card. By now, Karen was getting curious, and I was finally in my mojo. I trimmed, and punched, and shifted the pieces, playing with the arrangement, placing embellishments. Then, it was finished! I had to give a couple of the images to Karen, and went home with the rest, one of which will soon be on a scrapbook page of Keeley. I could just see her on a page with Keeley playing dress-up with her mom's heels and purses, and jewelry!
Here's the card:
And now for the secret I told you I would reveal today. Those rhinestones started out as clear crystals, and I dyed them pink and green. How? With my Peel Off markers!!! That's right, just color right on the crystal, and Viola! Colored crystals. If you don't have the Peel Off Markers, you can use Sharpies, or any permanent marker.
Close up of the rhinestones colored with the markers.
This opens up all kinds of possibilities. They also work on the little pearl embellishments, on your Peel Offs and other brand metallic stickers, of course, metal embellishments, brads, eyelets, even acetate! Now, don't even tell me that your creative juices aren't going crazy right now!!! Mine are.
I'm off to my craft room. Maybe I'll even be back tomorrow with more cards to share! Enjoy your evening!
lynda
Last Friday I got together with a friend to stamp and/or scrapbook. I was having one of those days where my mojo was gone, MIA, non-existent!!!! No mojo to be found....anywhere. Karen was happily scrapping away, pumping out page after page, and there I sat, fidgeting, starting and stopping, tearing up stuff I started, thumbing through magazines, just basically wasting time. I couldn't get an idea to save my life!!!! YES, IT DOES, DOES, DOES happen to me!!!!
Then I decided to check out one of my boxes. I figured I might as well just pull out an image or two and at least color it. I could still color, even if I couldn't make a creative move due to my mojo-lessness!
Out of the box came this adorable little girl. I had six of them stamped on a sheet of white cardstock. I cut one out, and proceeded to color it with my Prismacolors (colored pencils). As I colored, a funny thing happened. I really got into it, and started thinking of ways I could use this little girl on a card. I chose bright colors, and went to town. All the while, the wheels were turning. Turns out, all I needed to do was to start doing something, then the ideas started to come. After I got her colored, I cut her out, then started picking out colors for papers for a card. By now, Karen was getting curious, and I was finally in my mojo. I trimmed, and punched, and shifted the pieces, playing with the arrangement, placing embellishments. Then, it was finished! I had to give a couple of the images to Karen, and went home with the rest, one of which will soon be on a scrapbook page of Keeley. I could just see her on a page with Keeley playing dress-up with her mom's heels and purses, and jewelry!
Here's the card:
And now for the secret I told you I would reveal today. Those rhinestones started out as clear crystals, and I dyed them pink and green. How? With my Peel Off markers!!! That's right, just color right on the crystal, and Viola! Colored crystals. If you don't have the Peel Off Markers, you can use Sharpies, or any permanent marker.
Close up of the rhinestones colored with the markers.
This opens up all kinds of possibilities. They also work on the little pearl embellishments, on your Peel Offs and other brand metallic stickers, of course, metal embellishments, brads, eyelets, even acetate! Now, don't even tell me that your creative juices aren't going crazy right now!!! Mine are.
I'm off to my craft room. Maybe I'll even be back tomorrow with more cards to share! Enjoy your evening!
lynda
Tuesday, April 20, 2010
Technique Tuesday - All-over glitter
You have a great card idea, and a terrific image you're itching to use. You pick your colors, cut your papers, select your embellishments, and determine your layout. You carefully color your image, trim, and mount your image on the card. When you survey your finished card, you feel it needs something. Sound familiar?
Often, when this happens to me, I reach for the glitter. A little bling usually is just the right touch. Here's a technique that glitters the entire image panel for a really impressive look, like on the cards you find in the store! It is easy to do, and you probably have all the materials in your craft room.
Here's the card I made. The owl image panel (Hero Arts stamp, flower Spellbinder's die) has been glittered.
What you'll need:
- Multi crystal ultra-fine glitter
- Clear embossing powder
- VersaMark or other clear embossing pad
Directions:
- Mix embossing powder and glitter with equal parts each.
- Stamp image and color with desired medium. I colored the owl with markers. Heat set.
- "Ink" image with VersaMark pad (tap pad all over the panel with the image on it)..
- Cover inked image with embossing powder/glitter mixture, heat emboss, and you're done!
No, your eyes are not playing tricks on you. The pictures with the instructions do show a shoe image. I changed my mind and used the owl instead. Oh, yeah, and I mistakenly used the wrong embossing powder on it. I used a silver/clear glittered powder, instead of my home-made clear glitter/clear powder mixture.....not so pretty!
So, go ahead and bling it up!
Blessings and peace,
lynda
Often, when this happens to me, I reach for the glitter. A little bling usually is just the right touch. Here's a technique that glitters the entire image panel for a really impressive look, like on the cards you find in the store! It is easy to do, and you probably have all the materials in your craft room.
Here's the card I made. The owl image panel (Hero Arts stamp, flower Spellbinder's die) has been glittered.
What you'll need:
- Multi crystal ultra-fine glitter
- Clear embossing powder
- VersaMark or other clear embossing pad
Directions:
- Mix embossing powder and glitter with equal parts each.
- Stamp image and color with desired medium. I colored the owl with markers. Heat set.
- "Ink" image with VersaMark pad (tap pad all over the panel with the image on it)..
- Cover inked image with embossing powder/glitter mixture, heat emboss, and you're done!
No, your eyes are not playing tricks on you. The pictures with the instructions do show a shoe image. I changed my mind and used the owl instead. Oh, yeah, and I mistakenly used the wrong embossing powder on it. I used a silver/clear glittered powder, instead of my home-made clear glitter/clear powder mixture.....not so pretty!
So, go ahead and bling it up!
Blessings and peace,
lynda
Tuesday, April 13, 2010
Technique Tuesday - Paper Toling
Magenta is one of my favorite rubber stamp manufacturers. I love the detail in their images, their variety, and the quality of their stamps. I made this card for a Magenta card swap, sponsored by Picatso, resident cat at Magenta. I love Magenta's stamps for colored pencils, which is the medium I used on this card. I also love that many of their stamps make wonderful backgrounds, like the swirl stamp I used on the background here. I inked it up with VersaMark ink, and stamped it repeatedly to create the swirl background.
The technique this week is paper toling, which is actually raised images. On this card, I toled the nature sign, the bird, and the bird's heart wing. To tole, simply stamp the images two or three times. Color the main image, but do not color the parts that will be toled. Color the second or third copy of those parts. Then cut them out and add them to your main image using foam mounting tape! It's that simple, and adds so much dimension and interest to your card.
This is the bird portion up close, so you can see the toling detail.
Hope you are making some time to stamp! Try a new technique or two, or stick to the tried and true. Just get out your toys and play.
Blessings and peace,
lynda
The technique this week is paper toling, which is actually raised images. On this card, I toled the nature sign, the bird, and the bird's heart wing. To tole, simply stamp the images two or three times. Color the main image, but do not color the parts that will be toled. Color the second or third copy of those parts. Then cut them out and add them to your main image using foam mounting tape! It's that simple, and adds so much dimension and interest to your card.
This is the bird portion up close, so you can see the toling detail.
Hope you are making some time to stamp! Try a new technique or two, or stick to the tried and true. Just get out your toys and play.
Blessings and peace,
lynda
Wednesday, April 7, 2010
Technique Tuesday - Distressed Vellum With White Highlights
I love the look of this technique. It's features the elegance of vellum, yet has white highlights to make it exciting. Here's how it's done:
- Stamp image onto vellum panel. I used Tim Holtz Distress ink. Heat set to dry quickly.
- Turn piece over onto a piece of craft foam. Using an embossing stylus, run the stylus along any areas you wish highlighted. I highlighted the hash marks the stamp image had on it. Press lightly, as you don't want to poke through the vellum.
- Sponge ink onto back of image (same side as you "embossed" with the stylus). Heat again to dry ink. Adhere to cardstock panel.
Tips: -Press firmly enough to get the raised, white lines. Turn the piece over frequently as you work to be sure the marks are showing.
-Do not press so firmly that you poke through the vellum.
-Use heat tool to dry vellum after inking. Do not get too close, as you don't want to burn the vellum.
That's it! Hope you'll give this a try, it's really fun to do, and you'll love the results.
Blessings and peace,
lynda
Subscribe to:
Posts (Atom)